Rebody Z3 Tribute GT project

DomiMik

Zorg Guru (II)
German Zeds
Joined
Jul 10, 2020
Points
114
Location
🇭🇷 》Croatian living in Germany《 🇩🇪
I did find a lot of clear coat runs and almost entirely covered in orange peal.
In case you haven't already taken care of the clear coat runs I suggest you buy yourself a paint planer, that's absolutely the easiest way to deal with it. Afterwards you'll need to sand the spots down with 1500 and 2000 grit paper and give it a good polish and they will be gone. Plenty of DIY instructions online if you've never used this before.
20240916_055537.jpg
 

Foglem

Zorg Addict
American Zeds
Joined
Nov 14, 2022
Points
46
Location
Ann Arbor, Michigan
Model of Z
M Roadster
Enjoying the car before I get to wrenching on it (or sanding in this case) again. Took it out for some drives and an autocross! Unfortunately, it was very wet so traction was definitely an issue, but it was still really fun as always.

IMG_20241013_123029965.jpg


IMG_20241013_123014253.jpg

IMG_20241010_180937226.jpg


Here's a fun clip:
View: https://youtu.be/aRKLai1G0zw?si=sKanEeU3LK-kz-Cm


I have a few more videos on instagram if anybody is interested. I'm called "cheever13". I don't really know how to link it here. Anyway....
More updates to come as I work on the paint more, interior, storage space(s) and see what kind of wear and tear I'm looking at.

Thanks!
 

Foglem

Zorg Addict
American Zeds
Joined
Nov 14, 2022
Points
46
Location
Ann Arbor, Michigan
Model of Z
M Roadster
Gearing up for winter and next steps!

I'll take the wheels off and store them for the winter (I don't want that fancy rubber to de-laminate in freezing temps).
1. Work on the clear coat runs
2. Knock down all the orange peel
3. Finish off wheel well liners
4. New windshield weather strip
5. Got a new steering wheel stitch on cover that I'll try. A new wheel would be cool, but a lot of other people keep taking money.
6. Turn the original subwoofer location into a lockable storage bin.
7. Rear wind deflector
8. Finish the trunk
9. ??? Reserving this spot for whatever I get distracted with.

Have some pics!
IMG_20241020_101532387.jpg

IMG_20241019_161625437.jpg

IMG_20241026_112635404.jpg


Thanks
 

Foglem

Zorg Addict
American Zeds
Joined
Nov 14, 2022
Points
46
Location
Ann Arbor, Michigan
Model of Z
M Roadster
The cold weather has set in. I've removed my fancy shmancy summer tires and stored them inside.

Three items addressed today.
-Steering wheel
-Wheel well liner
-Clear coat runs

Steering Wheel!
During one of my autocross sessions it rained. The steering wheel, which is definitely showing its age and wear, began to disintegrate in my hands. I decided to try out something new...
IMG_20241207_135127586.jpg

IMG_20241207_145452901.jpg

IMG_20241207_193923181.jpg

I decided to try a stitch on steering wheel cover from a company called Stitching Cover. I was able to pick a material, style and colors. Naturally I chose a green stitch and top center marker to match the car. I'm very happy with the results. We'll see how it holds up!

A fun mini-project I'm working on is a cover for the BMW logo. More on that later.

Wheel Well Liner!
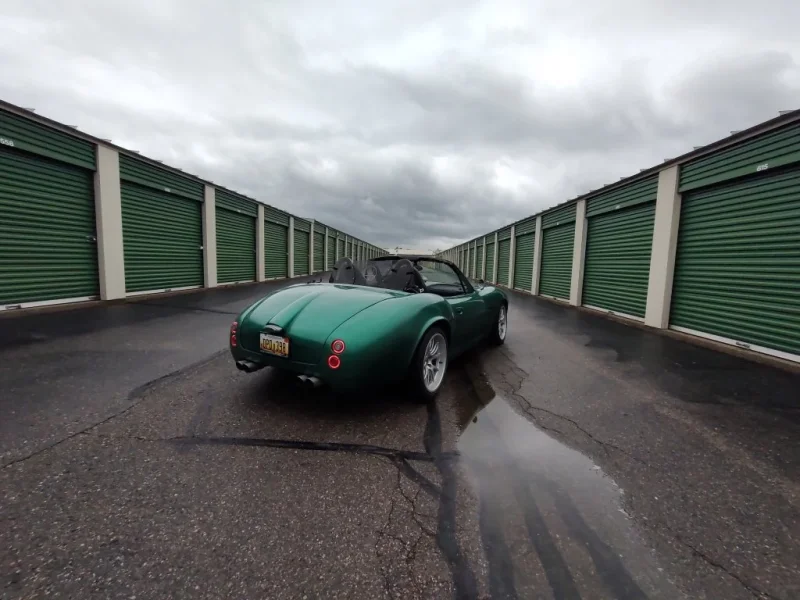
This picture was taken during Halloween. I really need to work on a hood stay. Anyway back to the wheel well liner.
IMG_20241008_192409808.jpg

You can see in the picture that I have used the OEM wheel well liners but had to cut them back significantly. There is a gap between the liner and body. The tires throw rocks up towards the back of the headlights and I'm finding rocks in the headlight buckets!
IMG_20241208_201100574.jpg

I ordered some door brushes to bridge the gap. This was a suggestion given by Pingu I believe. Thank you. This is a great way to bridge the gap and avoid squeeks.
IMG_20241208_201123061.jpg

The brushes came with this bracket. I think what I'll do is take a hack saw to it and make a few pieces like what I have in my hand there. I'll bond those to the inside of the wheel well and mount the brushes to that. This will make the brushes replaceable as well as ensure they stay mounted in the direction I want them.

Clear Coat Runs!
There are quite a few runs in the clear coat. I decided to try and mix a few techniques I've seen on (of course) YouTube.
IMG_20241208_195423591.jpg

I taped off the area just to define a working area. The risk here is sanding through the clear coat where I don't want it to. What I did next was apply glazing putty over the run:
IMG_20241208_200242609.jpg

I then started wet sanding with 400 grit. The idea here is that the body filler gives me something to work against and help prevent me from sanding through areas where I don't want to sand.
IMG_20241208_202719183.jpg

Knocking down the run and watching the filler start to feather out. I then switched to 1500 wet sanding. This was a big jump. Why did I do this? It was all the sandpaper I had :) I did notice that the tape began to shred as I continued to work down the filler/run. I decided at 1500 it was safe enough to remove the tape and continue.
IMG_20241208_203348431.jpg

There we have it! Run almost completely gone. I will do this for all of the runs I have, then I'll have to go over the entire car to take care of the orange peel. One step at a time!

Thanks!
 

Foglem

Zorg Addict
American Zeds
Joined
Nov 14, 2022
Points
46
Location
Ann Arbor, Michigan
Model of Z
M Roadster
Made a bit more progress on the body. With the runs mostly gone it's time to attack the orange peel in the clear coat.
For bad spots:
-hand wet sand 1500->2000->3000
For everywhere else I started at 2000.
Before:
IMG_20241231_135036868.jpg

After:
IMG_20241231_211539855.jpg


Slowly making my way around the whole car at 1500/2000 but got the driver's door down to 3000 to see how the process will go.
IMG_20241231_222230884.jpg


I would like a bit of advice though. I've been recommended to use Rupes brand chemicals for the final step, but I'm not sure what product(s) to use.

Do I need to do a 'cut' pad with a DA with maybe a fine compound? Or should I just go to a polish step? I am doing research on this but wow it is a slippery slope of products and my head is spinning.

Thanks!
 

Zephyr

Zorg Guru (III)
Supporter
Joined
Aug 10, 2022
Points
136
I do not use Rupes, I use 3M and to remove orange peel, after the 800/1000/1500/2000 torture, I prefer 3M "perfect it" white then green then yellow with their pads.

For my shittiest jobs that have many runs and bubbles, I attack with "hookit"
But you have to be really sure of what you are doing with this. No prior sanding, just hit the paint and work with the buffers rpm and your hand pressure. (Try before you ruin its a 600 grit).
 

Foglem

Zorg Addict
American Zeds
Joined
Nov 14, 2022
Points
46
Location
Ann Arbor, Michigan
Model of Z
M Roadster
It's slow going due to life and negative temperatures. I did make SOME progress though!

As mentioned before, the method I landed on was wet sanding from 1500->2000->3000 then polish. I realized I got a bit ahead of myself and went back to my practice piece to get the method down right and do some experiments at the same time.
The first pick is the heavily orange peeled practiced panel. I taped it off and each section I will sand a bit further. So the first is 1500, second panel is 2000 then 3000. Then I will polish all 3 so I can get an idea of how smooth I need a panel to reduce as much orange peel as possible. Also this is to make sure my method won't burn through the clear coat.
IMG_20250105_214156803.jpg
IMG_20250109_200146255.jpg

I did an....'ok' job at sanding it. The practice panel is WAY worse than the car thankfully. However the polishing taught me a lot AND I'm super excited to try this on the car...so I did just that.
The driver's side door was sanded down to 3000 grit then I poished with a fine grade material. This is ONLY after maybe a few seconds of polishing on a DA. So there are still some 'cloudy' spots. Wow I can't wait to see the complete car like this. I'll show a before/after:
IMG_20250110_164316025.jpg
IMG_20250110_165239641.jpg

So shiney.

Thanks! More to come...eventually! If I only I got paid for this.
 

Pond

Zorg Guru (III)
British Zeds
Joined
Dec 26, 2016
Points
144
Location
Spaldingski, Lincs
Model of Z
Z3 project and E89 Z4
You have a LOT more patience than me. I couldn't stand the mess or the hours of repetitive work TBH.
 

Foglem

Zorg Addict
American Zeds
Joined
Nov 14, 2022
Points
46
Location
Ann Arbor, Michigan
Model of Z
M Roadster
It's been a minute! I had to relocate the car and found a storage unit of all places to finish it in. Good thing everything I have is battery powered. I'm wet sanding everything by hand anyway.

So latest updates...
Car is in a new home:
IMG_20250414_185927756.jpg

I've been sanding so much. I ended up dropping to 1000grit wet sand to try and speed things up. Helped in some places and in other places I burned through, which took the paint right off. Sigh. Just keep pressing forward.

I made some additional changes to how I was wet sanding. In some ways I wish I didn't try to go for near perfect flat. Leaving some orange peel would have helped hide imperfections. Too late for that now, but I did decide to leave the orange peel almost untouched towards the bottom of the car. These areas don't stand out too much and need all the protection they can get. This car is a rock chip magnet.

I am about to start sanding at 2000 grit and decided I will use dry guide coat to help me see when I've taken care of the 1000 grit scratches. It's a lot of work and I really hope this pays off.

The next on the priority list is the headlights. When I installed the buckets I unknowingly installed them at a forward pitch. It is aggressive enough that I can't adjust the lights up enough to make up for it. Here is the bracket:
1745805918311.png

The headlight is captured on the ring floating on 3 spring&bolts. I figure if I replace the bolts with longer ones, then add washers under the springs, I can pitch the headlight up without too much trouble...time will tell.

I don't have many other updates! I'm still working, but it's all sanding all the time. We'll get there.

Thanks!
 

Foglem

Zorg Addict
American Zeds
Joined
Nov 14, 2022
Points
46
Location
Ann Arbor, Michigan
Model of Z
M Roadster
Wow. So much sanding. The good news is that my shoulders are way stronger now. Which is great! The bad news but I have to live with it is that I made a bunch of amateur mistakes. Live and learn! It's a bummer, but now I know for next time. Let's get to it.


I finished sanding at 1000 grit! Then did everything again at 1500 grit after I learned that 2000 won't remove 1000 scratches. This really helped knock down the heavy organge peel. I started using a little bit of soap in the spray bottle and being more liberal with the water and what a difference it makes. Highly recommend. I didn't realize what a help that would be. Here's Loki...

IMG_20250503_185248831.jpg


As much as I hate to post it,maybe it'll be helpful for somebody... here are my mistakes. I burned through the clear coat and paint in some spots. The worst was on the driver's headlight.
IMG_20250503_210314655.jpg

You can still see orange peel here and I'm choosing to leave them. More importantly, this is a pretty bad burn through. I looked up the business that made my paint and found that I could order small paint brush pens from them for only $11 U.S.! (well, for now it's 11...we'll see)
IMG_20250503_211230089.jpg

I wish I kept the lighting the same so you could see the difference more clearly. This was after 1 coat. I put on 3 coats and I'm happy to say that as it dried it started to blend right in. I also have a clear coat correction brush I'll use later on. I corrected a bunch of other spots. None as bad as this though.

IMG_20250503_211736130.jpg

Calling it after a long day. I'm actually starting to see progress. I'm anxious in both excitement and worry as I get close to polshing time. I had a fine finishing compound ready to go, but since I'm stopping at 2000 grit....I decided to stop at 2000 because I was starting to burn through in places...I am ordering a coarse compound to do before fine in order to cover up the 2000 grit scratches. Boy I hope this pays off. Very antsy to get it on the road soon.

I have about a dozen other things I want to fiddle with but I could really go for a drive. Next update coming soon! We've got momentum again!
 

Pond

Zorg Guru (III)
British Zeds
Joined
Dec 26, 2016
Points
144
Location
Spaldingski, Lincs
Model of Z
Z3 project and E89 Z4
Kudos for your perseverance. I would have been in touch with a bodyshop long before now.

They say patience is a virtue.....when it comes to cars it's a necessity IME. :)
 

Foglem

Zorg Addict
American Zeds
Joined
Nov 14, 2022
Points
46
Location
Ann Arbor, Michigan
Model of Z
M Roadster
I started polishing!

This took me a few rounds to figure out. I started with a coarse compound. It took a lot longer than I thought to get the 2000grit scratches out. It's not perfect, but that's part of the learning process!
IMG_20250511_171755972.jpg

This was my first attempt. LOTS of scratches still showing through. I figured out I could be more aggressive. I spent more time on the panel, sped up the opm on the DA, used less compound and added a bit more pressure on the tool. All those things really transformed the from above to this. Once again I didn't make a proper comparison photograph, but you can see the difference.
IMG_20250511_192042903.jpg

So next step is the fine polishing step. Then to re-mount headlights and work on the trunk lid catch.
For a more direct comparison before and after the coarse compound polish:
IMG_20250511_161335082.jpg

IMG_20250511_202104125.jpg


Exciting stuff. I might actually get to drive soon!
 

Duncodin

Zorg Guru (IV)
Supporter
Joined
Sep 8, 2021
Points
159
Location
Pontrhydyrun - in Crow Valley
Model of Z
M44 FrankenZed
I see water bottles by the side. i assume you have no running water. That's a shame. When wetndrying i use tons of water from the hose. I hope there's no hosepipe ban any time soon!

But it's looking good 🤞
 

Pond

Zorg Guru (III)
British Zeds
Joined
Dec 26, 2016
Points
144
Location
Spaldingski, Lincs
Model of Z
Z3 project and E89 Z4
I hope there's no hosepipe ban any time soon.
Don't think they have those in the USA. Only in the UK, where it normally rains every other day, do we get water shortages when it's dry for a week!
 

Foglem

Zorg Addict
American Zeds
Joined
Nov 14, 2022
Points
46
Location
Ann Arbor, Michigan
Model of Z
M Roadster
Back at it and some fun stuff.

I was able to fix the headlight pitching issue! The headlight was floating on 3 bolts with springs. I added stacks of washers on the lower 2 bolts with longer bolts and was able to correct the headlights pointing down. Id show pictures but there isn't much to look at.

I went over the body with a coarse compound and then fine compound. I think some scratches are too deep to remove without burning through the clearcoat entirely,so I did my best to just clean it up. I then followed up with a wax (to hopefully fill in some of the scratches) and followed up with a sealer to keep the wax on.
IMG_20250515_214222816.jpg


With that done I put it back together. I still have quite a few things to finish/make for it, but it's time to enjoy it a little. I also bought a wind deflector off of Etsy with the car logo etched in! Super excited about that.

Took it to the first car show today and got a pretty nice reception! Then it started raining so I stopped for some glamor pics. More to come!

IMG_20250517_131725334.jpg
 

Attachments

Top