Seemed like a good idea at the time!

IainP

Zorg Guru (II)
British Zeds
Joined
Feb 20, 2019
Points
119
Location
Out of my Tree, North of Perth, Scotland
Model of Z
1.9
I had plans for lots of painting and taking bits off, except it hasn’t stopped raining. My knees no longer appreciate being cold and wet, so it was indoor stuff.
A decent look at the rear exhaust quickly showed it’s not worth refitting. Both boxes were already cracked and welded, the pipe had needed a repair. Now the intermediate box is split. And it’s absolutely full of water. ?
2E186EC2-189C-44C5-A434-D9DD49FE2661.jpeg
Now I could smack the box together and reinforce with weld. But I just can’t see it lasting.
If I’m fitting another exhaust it’s going to be stainless.
I have quite a few stainless bends in various sizes, so I thought of just buying some boxes, except all the rears available are smaller than standard. Less volume means more noise, I hate noisy exhausts, Soo, I thought I’d buy the parts and make a rear box. Err, no, a 10x6x16” case + end plates + perforated tube + wadding is over £120, before adding polished tube for tailpipes, flange or carriage.
So I’m going to buy sheet, perf tube, wadding, a flange and make the lot from scratch. Cos I’m stupid that way.
I have worked with stainless wire and small plate, I know it work hardens easily and can be a pain to form. I have some old scrap that was once a trolley, only 0.7mm when most exhausts are 1.2, but that should make it easier to form right? The shelf already has a partially formed fold, so I thought, feck it, I’ll make the box rectangular rather than oval. Some hardwood plywood, edges reinforced with ca and off we go.
I have enough for 4 end plates, so, 1 practice, 2 proper and one saviour if I feck anything up.
Problem 1 immediately apparent, it’s Really Hard, I was going to wreck the faces of my planishing hammers, switched to the ballpein. Problem 2, it doesn’t shrink like steel does, I battered and battered and battered the corners, but they simply would not fold and shrink. I’m sure the neighbours loved it. Resorted to experimenting with slitting it. It works, I now have a plan for a couple of little experimental pieces.

A1891EB9-BE53-483C-B9EB-8D5251941D88.jpeg
Really serious problem 3, you can’t stretch and cut the stuff with a dimple die. It should cut a disc out and form a dimpled flange. It warped to Friar Tuck.
Cutting a hole, then dimple die’ing, stretches the plate enough the pipe doesn’t fit. My next smallest die is 44.5mm and I want to use 50.8mm tube, will it work? Well, almost, there isn’t much in it, I should be able to cut that back to get a nice fit.

429A2F75-F0D4-4CA5-83B4-30F75E6105B7.jpeg
Further experimentation required, but I think I can get this to work out. Should end up straight through, no back pressure except the cat and yet quiet. I have a stupid plan for the shotgun tailpipes too!
 

IainP

Zorg Guru (II)
British Zeds
Joined
Feb 20, 2019
Points
119
Location
Out of my Tree, North of Perth, Scotland
Model of Z
1.9
My wife is rather more fond of saying “it’s all your fault”. Which is probably true.

It’s also my fault younger son took his guitars to bits and modified them. Though he’s taken that a stage further now, to designing and making them from a block of wood, at least I don’t attempt to build cars from scratch. Yet.

Eldest lad has just asked if we can Hillclimb a classic Mini instead of the Z. We rebuilt the bodies of two, which is how he financed his e36 at 18, so it’s an itch I think. I need to Mot this asap, sell my Smart and daily the Z. My wife has a ‘one in, one out’ policy as regards cars now, I wonder why!
 

IainP

Zorg Guru (II)
British Zeds
Joined
Feb 20, 2019
Points
119
Location
Out of my Tree, North of Perth, Scotland
Model of Z
1.9
Lots of bits arrived, special thanks to Andy, spurs fan in a coupe for the headliner and vents.
19FCF950-0C0C-440F-9FEA-C18E9E98A81C.jpegAttacked the exhaust endplates with a vengeance, dear god stainless is hard. I hammered and hammered until I was knackered and still only formed one corner. No pics, because I’m not that happy with it. I actually phoned all the local industrial places to see if anyone had a shrinker/stretcher in stock. That’s all gone on the back burner though, depends on what happens Mini wise.
I had these eBay dampers taking up space. Pulled the Boge and stuck these on, partly to make space and to check they actually fit.

9AB13A7A-6326-46FB-BA8B-7950ECC1314F.jpeg
Which they do..Just. I was considering going full coilover, but that would require offset top mounts.
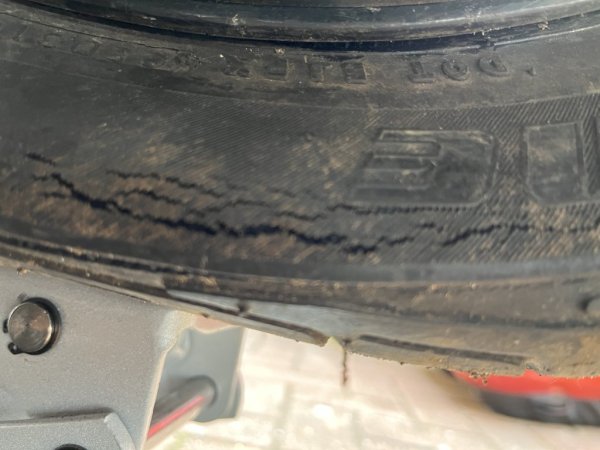
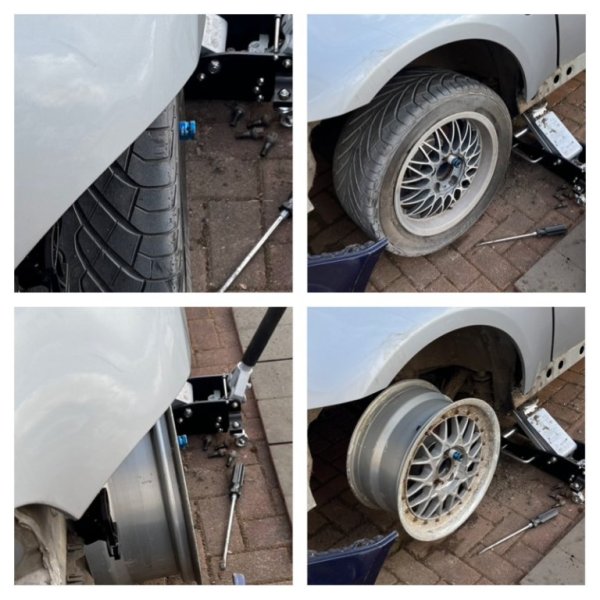
Jacking the wheel up to refit the damper I found a huge crack in the tyre, it was slightly down in pressure, the jack distorted it which probably made it more visible. I expect it’s sat flat for some time in the past, I’ve just been lucky to jack it in the same place. Scrap.
416F6E88-4AB5-4C2A-8E8E-C31EC19F845F.jpeg
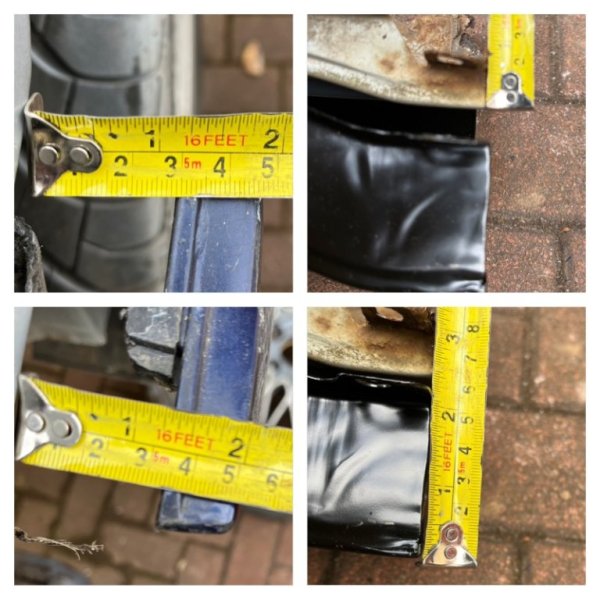
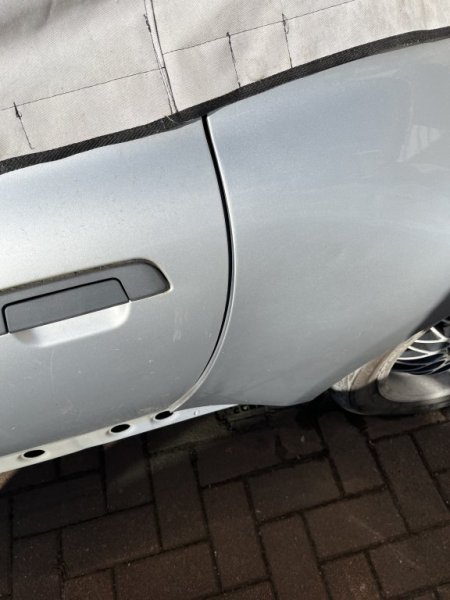
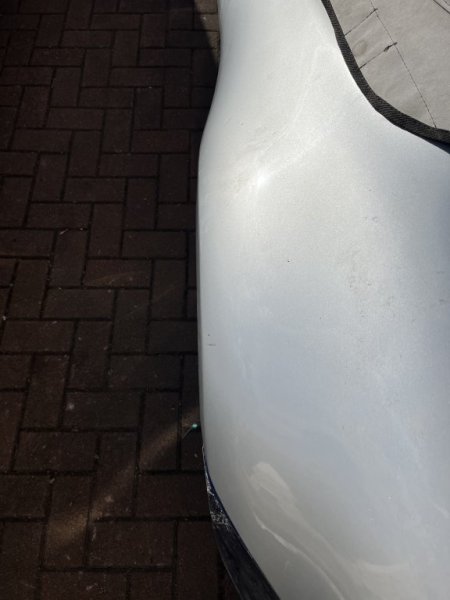
As I was about to pull the rear wings off to do the sills and fit the wider ones, I thought I’d measure how wide they actually were.
6B5660DE-54A3-43EE-8F3B-22EC1DB7E4D1.jpeg
Certainly not the 25mm someone assured me.

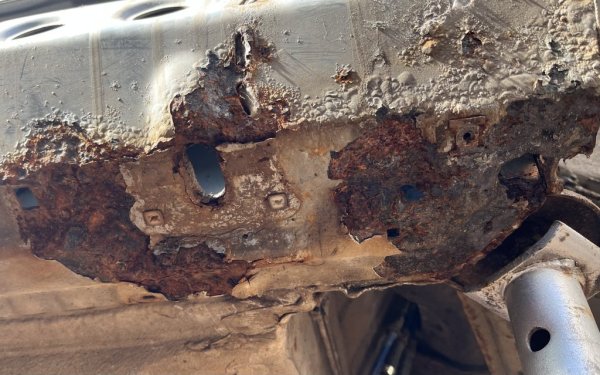
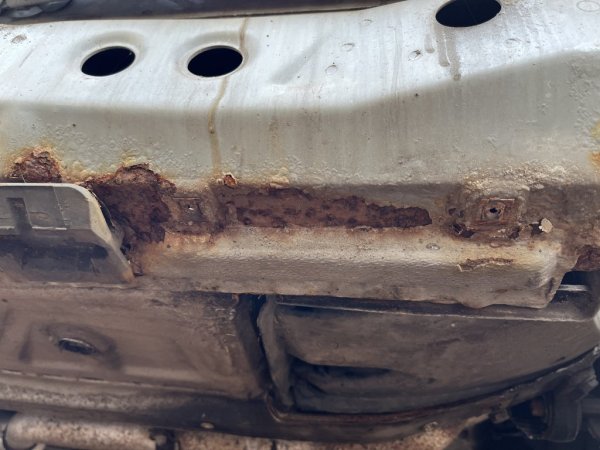
I was quite eager to find out how bad the inner sill was on the left side, I could see a tiny hole at the rear.
661ED700-5EF2-40FE-B5DA-26F7B53D59B4.jpeg
Not that bad really, I expected half of it to be missing.
The front is rusty but solid.
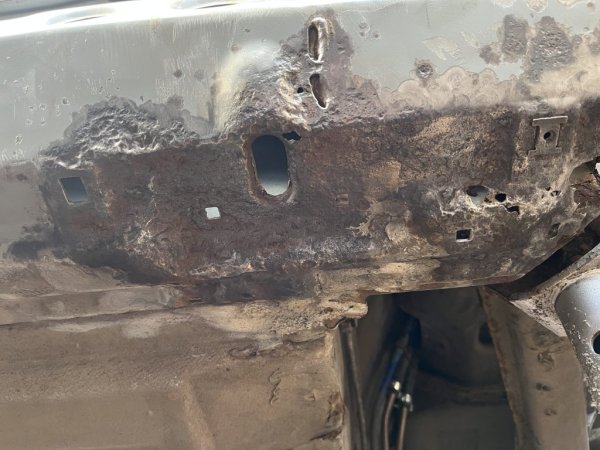
Wire brush in a grinder, there’s a repair required right at the rear. All heavily pitted but solid when smacked with a hammer. Wiggling a finger inside reveals no rust on the inner metal except where it’s holed.
5D9737DE-B882-4B98-ABD8-BBF55F473C57.jpeg
Im unsure whether to just repair the holes areas, or cut the whole thing back to that square hole on the left.
At that point rain stopped play, I have a few days off this week to do both sills and drop the beam, and what’s the Forecast? Snow. Wonderful.
 

Attachments

IainP

Zorg Guru (II)
British Zeds
Joined
Feb 20, 2019
Points
119
Location
Out of my Tree, North of Perth, Scotland
Model of Z
1.9
Several warnings from the Met Office, but no snow, Yet. Certainly cold enough, 5 layers on whilst working on the car today. Nice to do bits of welding in the garage, as it heated the place up.
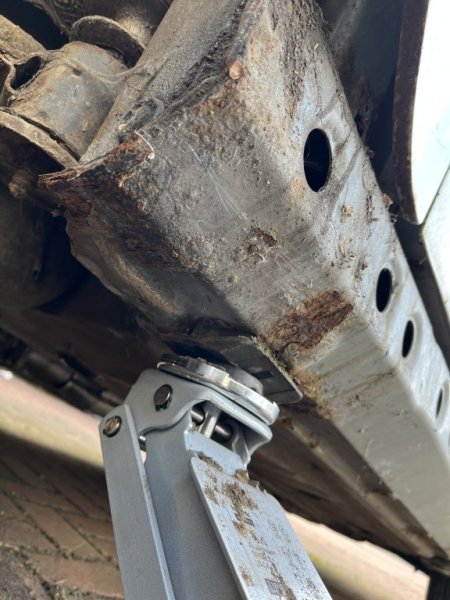
Dragged the wide rear wings I got from Andy, spurs fan in a coupe, last year , out of the loft. Titan rather than Arctic, but it’s not far off. I need to find my spot weld drill bits and get the brackets off, it would be quite difficult to sort the back of them properly with the brackets in place.
E7F1E381-9849-4E02-A91B-30CE499E2213.jpeg
It’s certainly, absolutely, definitely not a 25mm difference between wide and narrow body. It’s 50mm. Each side. I need wider wheels. Even with spacers, I need wider wheels. Bugger. I have some 8.5” RC’s, though one barrel is cracked, oh dear.

E0B2B5BA-506A-4A3B-80B9-73600FFC937D.jpeg
 

Digitalize

Regular Member
Joined
Oct 2, 2022
Points
14
Widebody wings on a narrow body car you have a poor man’s Z3M rear wheel fitment, will swallow a 10 easily.
 

IainP

Zorg Guru (II)
British Zeds
Joined
Feb 20, 2019
Points
119
Location
Out of my Tree, North of Perth, Scotland
Model of Z
1.9
Finding them in 16 or 17” is a bit of a problem, nothing less that £250 a wheel s/h. I’ve just been on SSR’s website, they don’t do barrels for the RC. Only option I can see is going 3 piece, that’s close to £700 for the pair, not happening.
It’s going to be 25mm spacers and a stud conversion initially I think.
 

t-tony

Zorg Expert (II)
Supporter
British Zeds
#ZedShed
Joined
Dec 31, 2013
Points
226
Location
Torksey Lock,Lincoln, England
Model of Z
E89 Z4 23i Auto
That’s how it feels here on a Shed day with 8 or 10 Zs on the drive.:thumbsup:

Tony.
 

IainP

Zorg Guru (II)
British Zeds
Joined
Feb 20, 2019
Points
119
Location
Out of my Tree, North of Perth, Scotland
Model of Z
1.9
Glad I’m not alone then!
Snowed the odd flake damn near all day, went Very dark at one point, started snowing, 5 minutes later brilliant sunshine, Scottish weather is weird.
Tried an RC whilst I was mucking about with the wing, not a great deal of difference.
7794EFC8-E5B6-4A5E-8E99-5308835C9CF3.jpeg
Right sill has some rusty bits, just surface really, a quick clean and I could prime it with Finnegans.
2108D9B3-AE5D-4F3D-83DB-812BC5D8A940.jpeg
33C6F9E6-8633-4D7C-BE19-40D1BE7AB9DC.jpeg
I’d forgotten to release the axle nuts, thankfully I remembered before disconnecting the handbrake cables. I really don’t like those lock washers BMW use, they lock well, but bending the things back and getting them out is a faff I don’t enjoy. I have a spare 30mm socket I’ve ground the lip off, so the teeth are flush to the end. I find if I smash the socket on with a bfh it crushes the lip of the washer flat. A five foot piece of box section over a breaker bar and it’s easy peezy.
90A57D35-CF8C-42C0-9CA1-EAEB76FC4775.jpeg
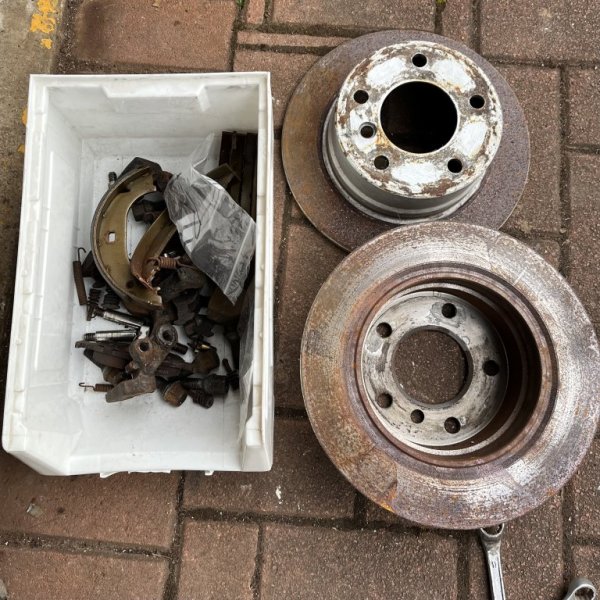
Stripped the rear brakes whilst I have easy access.
I’ll reuse the pads and shoes, the car only did 2000 miles and 1000 of that was M way down to Hemel and back. I may use the discs if I can’t find the Fancy Dan ones I have . . Somewhere. That’s only surface rust, a zap with the random orbit and they’ll be good as new. Re clean the hardware. Totally strip and redo the calipers, I’d cleaned them before but this time I’ll replace the pistons.
D65C8968-7E9E-4039-AD40-AF7F9A2F029F.jpeg
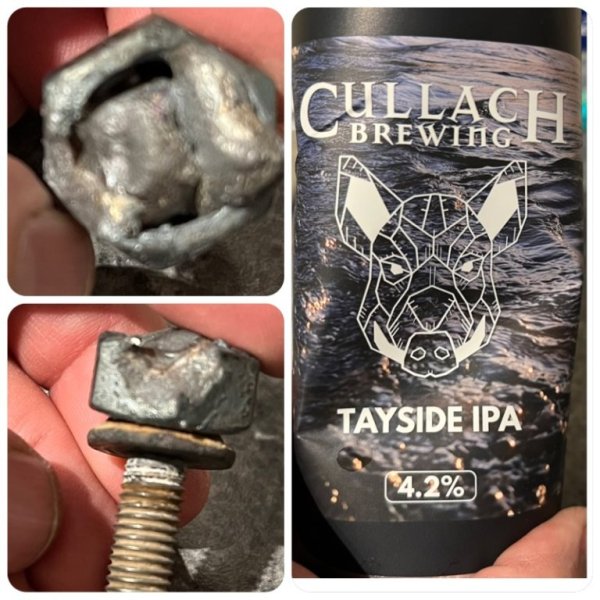
The Bolts of Doom? Yeh, they’re feckin’ “doomed, doomed ah tell ye!” Sprayed, battered, sprayed on the inside, stripped, battered. Chewed with an extractor. I’ve gotten one out by heating the hell out of it, then smashing a smaller extractor on.
At that point the sun dropped past the hills and the temperature dropped dramatically. Sprayed the remainder, I’ll heat them in the morning.
 

IainP

Zorg Guru (II)
British Zeds
Joined
Feb 20, 2019
Points
119
Location
Out of my Tree, North of Perth, Scotland
Model of Z
1.9
Only managed a couple of hours, got the sills a first coat of Hammerite smooth .
The two bolts on the left side came out with an extractor and masses of hammering. The one on the right, nearest the fuel tank, no chance. Tried different extractors, they just planed the damn thing smooth. Battering alternatives into the Center did nothing. I eventually thought F it, I have a welder. Took a 12mm nut, drilled it to 14mm, turned the gas up to the redline, the amps up and the speed down. Lined up 2 fire extinguishers and went for it. With the torch right over it, complete guesswork. Worked perfectly, came straight out with next to no effort.
The two big nuts needed a 5 foot bar, which was entertaining.
Pitch black by then, I’ll release the diff mount in the morning. I’m having a beer.
D0953A55-CA87-4B6B-A259-0A3210B4AA40.jpeg
 

IainP

Zorg Guru (II)
British Zeds
Joined
Feb 20, 2019
Points
119
Location
Out of my Tree, North of Perth, Scotland
Model of Z
1.9
Dropped the tank. The decision on whether to replace the bracket was taken for me, it was fused to the strap and it snapped. Still available from BMW but I don’t have time to wait, so I’ll just make one. The straps are an easy bend from 3mm steel strip.

853C5722-30F6-400E-87F8-960E62EA237D.jpeg
 

IainP

Zorg Guru (II)
British Zeds
Joined
Feb 20, 2019
Points
119
Location
Out of my Tree, North of Perth, Scotland
Model of Z
1.9
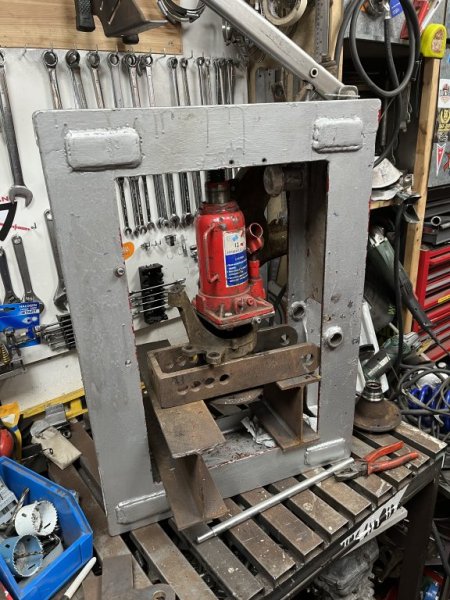
Rain has stopped play, so resorted to doing bushes and bearings. This thing is a homemade press, 2 sizes, depending on which way round I use it, hydraulic caliper actuator, metal bender and tube bender. All in one. Though I haven’t bent any tube with it, yet.
92058DC7-E638-4A3F-981B-9D2FC969EDA8.jpeg
Mad, but it works. Pressed both the hub and bearing out in about 5 mins.
 

IainP

Zorg Guru (II)
British Zeds
Joined
Feb 20, 2019
Points
119
Location
Out of my Tree, North of Perth, Scotland
Model of Z
1.9
Welding in the rain is great, not.
If you’re going to buy spot weld cutters, don’t buy cheap, they’re junk and don’t last, get cobalt ones like these, last for years.
2F5B6BAA-FD46-470E-8B0D-7E6FB193430F.jpeg
Peeking through the little hole in the inner wing and the grommet hole, things didn’t look great, so, I cut a section out a good 50mm above the grommet to get drill access.
4C4DDC56-D025-4C70-A0DE-6B241E24EDDA.jpeg
Eww, not looking good.
Chopped some more out, attacked with some brake cleaner and a wire brush.
4DDF104C-E46A-4DDE-A891-7C4E952E6600.jpegThat’s a lot better.
The inner wing is 1mm, or 18 gauge for our American friends, the sill 2mm, 14 gauge.
It would have been a lot easier if I could have gotten that bloody pin out, but it’s solid. The only spare socket I could butcher into a tool is 12 point, and it rounded it when I put a big bar on it.
My hammer forming skills are rubbish, especially 2 or 3 mm. I have gotten the drain in, and most of the profile of the sill, but it’s meh, I’m glad it won’t be seen.
9052D283-10AA-429C-B0C0-B8F7EB2D05F2.jpeg

The inner wing is neat though, won’t be visible once underseal goes on.
C89B421C-E63E-48A1-9D37-D59265D6FD88.jpegNot putting the grommet back in, I’ll spray it all internally with oil before the sills go on for good.
 

IainP

Zorg Guru (II)
British Zeds
Joined
Feb 20, 2019
Points
119
Location
Out of my Tree, North of Perth, Scotland
Model of Z
1.9
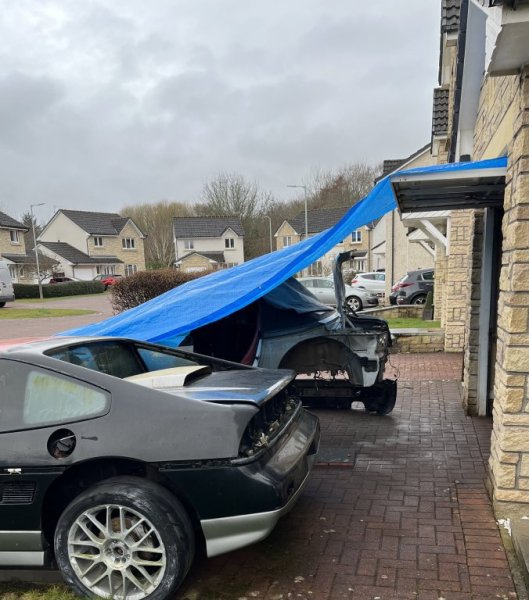
Just out of interest, has any work been done on the Pontiac Fiero ?
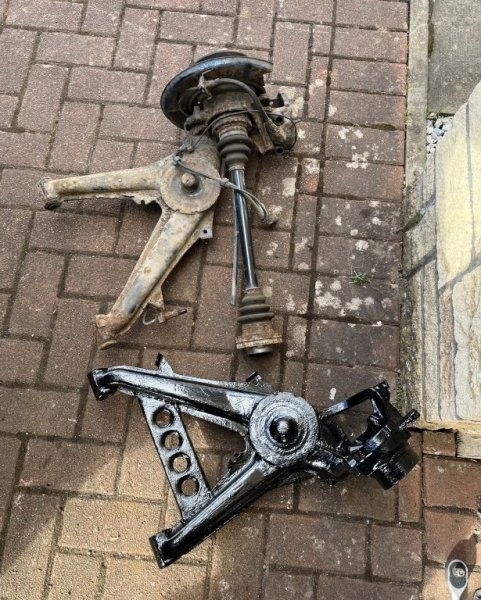
Yes. Not so you’d notice though. That’s an ‘88, last year of production, only year that got the brakes and suspension designed for it, though not the power steering. Stripped down all the calipers, I have about a dozen. The rear pistons make the bolts of doom seem like an elegant, sensible piece of engineering. I’m remaking the suspension and hoping to upgrade the brakes without anything screaming MODIFIED!
I quite like those little Pontiac’s something a bit different. I watched an entertaining series on a Fiero build that may be of interest.

View: https://youtube.com/watch?v=fMfqLtfsIj0&si=EnSIkaIECMiOmarE
Thanks, been watching that. Seems a bit more interest in them for some reason.
Quite an unusual little car, though it’s a heavy little fecker for what it is. The engineering is ‘strange’, some things are pared right down. Others are an obvious attempt to add weight to the front, to balance the boat ballast engines at the back.
I’ll finish it eventually.

Some folks can take a straight piece of copper brake pipe, correct length, bend it directly on the car, and make it look as if it came from the factory.
Not me, I don’t possess those skills, I have to spend ages bending it beside the steel pipe, then adjust it to the car. And after all that, it still looks like a blind monkey fitted it.

132598EC-4964-47A3-9C38-0A41391E6250.jpeg
On top of that I managed to lose one of the rubber pipes, how I did it, or where it went, I have no freakin’ clue.
 
Top