Baby Blue - Progress Thread

12//01/19

Decided that it was finally time to fix the oil leaks that I had been wiping clean every couple of months.

2 Areas that needed attention, oil filter housing gasket and the valve cover gasket

It seems that for the first time ever everything has gone smoothly, all bolts came loose easily using my Dewalt impact wrench - an unbelievable amount of power in that thing - just remember not to use it for tightening (ask me how I know!) =))

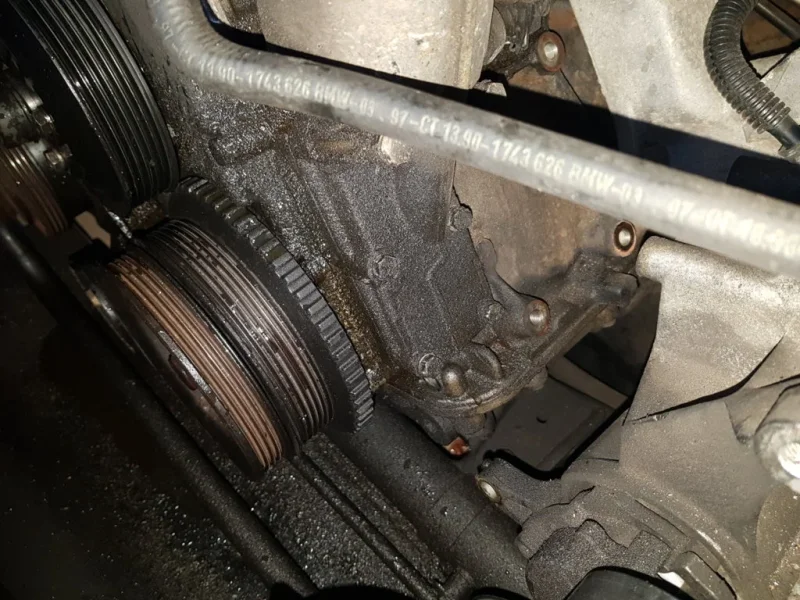
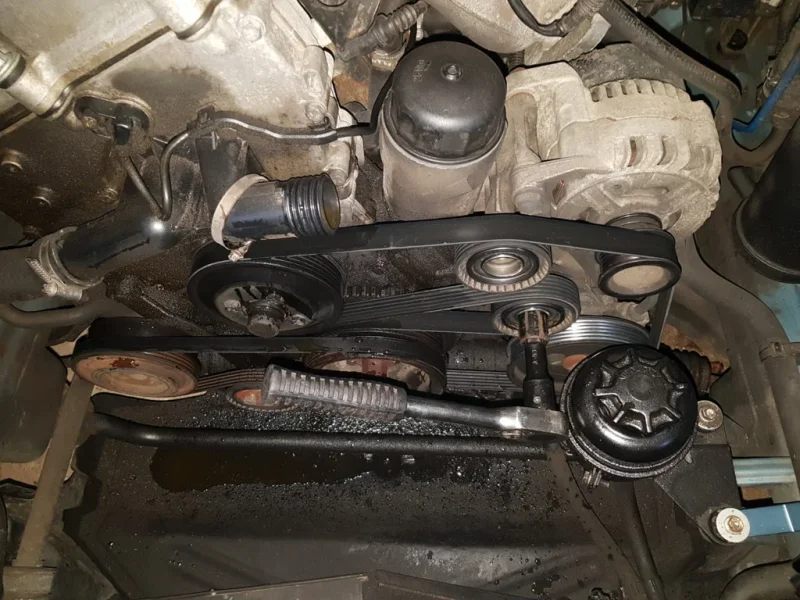
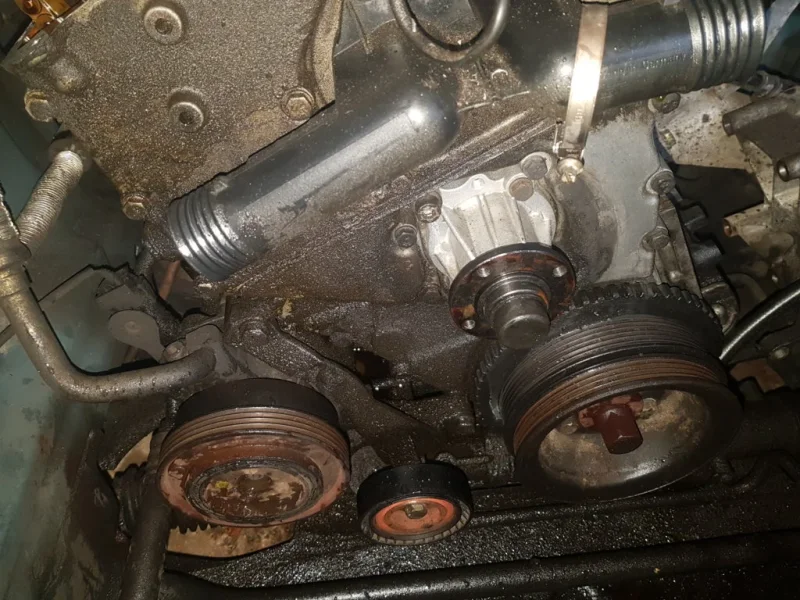
Having removed everything I could appreciate the scale of the leak, this would explain why I had to top the oil up every couple of months. The fluid on the undertray in the below pic is coolant that I wasn't able to catch successfully in my catch-pan but still a lot of oil on the engine itself!
20190112_150402.webp
20190113_132233.webp
20190113_111245.webp

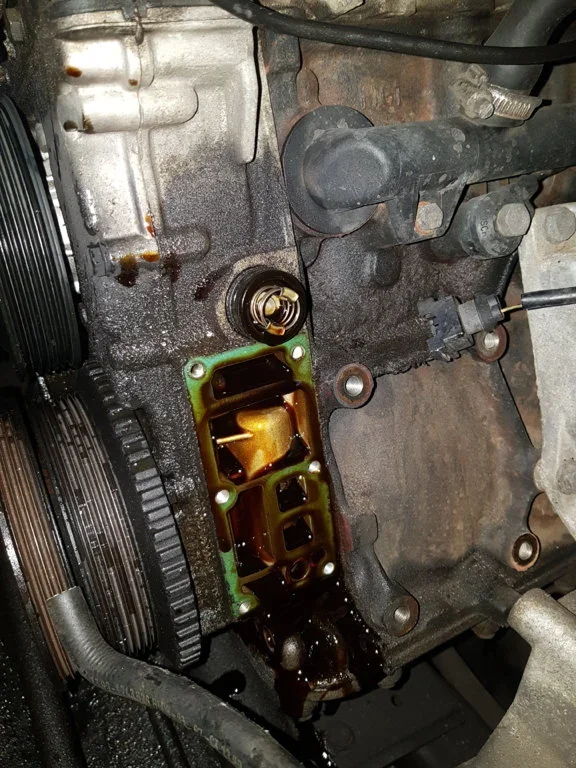
The oil filter housing gasket broke apart into lots of little pieces and was a bit of a nightmare to remove but did come apart.
20190113_111619.webp

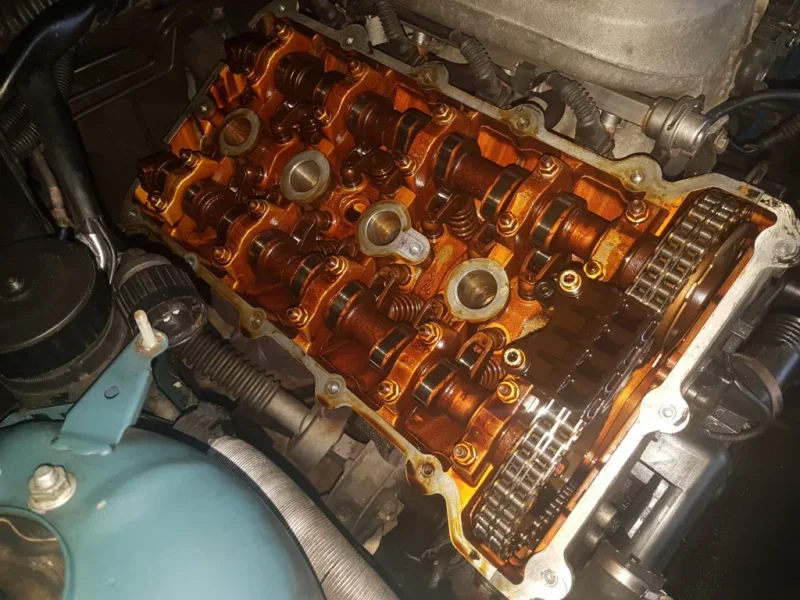
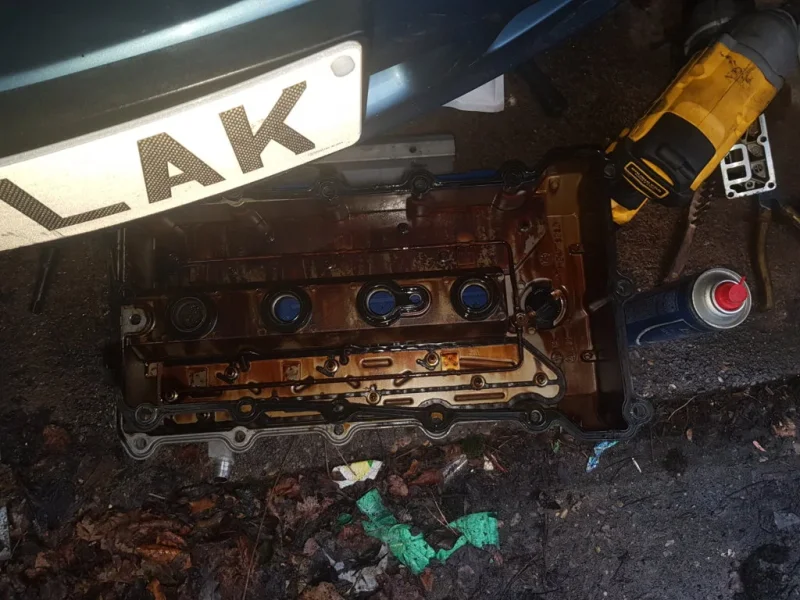
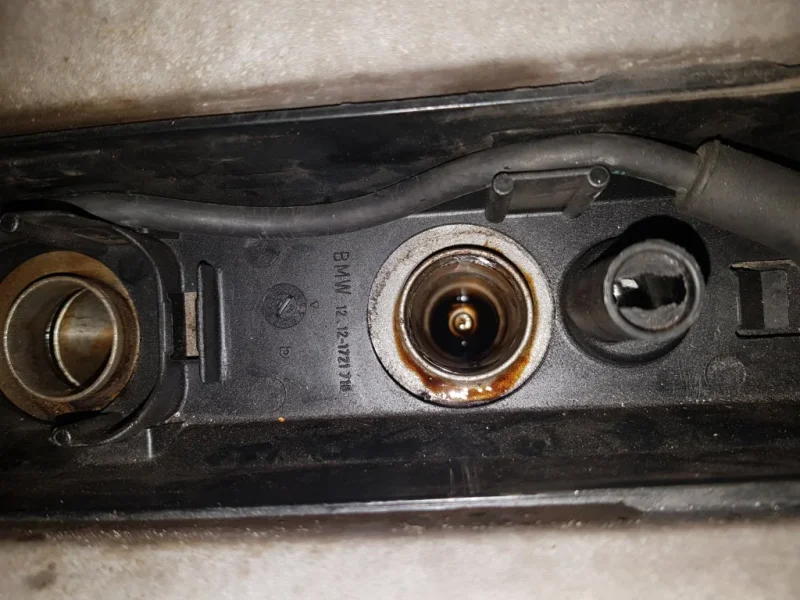
When removing the valve cover, I noticed a lot of oil in on the spark plug itself in cyl 1 and cyl 2 - so knew the seals underneath weren't any good.
20190113_115709.webp
20190113_124232.webp
20190113_124238.webp

Have had an advisory a couple of years ago for Power Steering rack leaking fluid but having seen this my thoughts are that the oil was leaking from the oil filter housing gasket onto the rack rather than the rack leaking (as the power steering fluid rarely needs topping up!)

Next job is to clean all the excess oil up which I can tell is going to be a fun job! Then replace the gaskets and put everything back together.
 
Blimey you have been busy mate.

After I finished the suspension and brake work last summer I told myself that I wouldn't do anything to the zed for a good 6 months, and I almost managed it! :rolleyes:
 
Hi Pete,

This is what I bought last summer, quite dear but when I was doing the rear subframe I found it to be very useful, I haven't yet found a single bolt or nut that it can't undo.

Screenshot_20190113-172648_Chrome.webp

Screenshot_20190113-172641_Chrome.webp


Hoping that it lasts a while - given that I use it once every couple of months there's no reason for it not too last another 10 years.

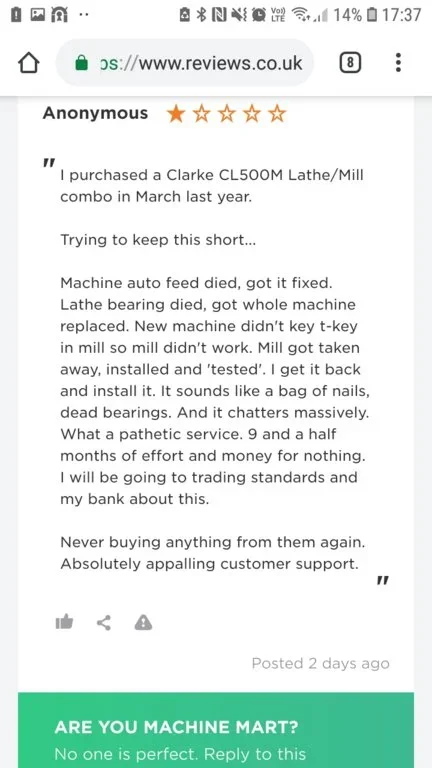
Re your Clarke impact wrench, I've read that Machine Mart aren't the best at returns or when you have an issue with your product - in fact on some sites they have shocking reviews!

Screenshot_20190113-173709_Chrome.webp

Hope you get it sorted anyway!
 
@Faheem looking good and glad all went smoothly. brake cleaner is good for smallish areas of oil spills otherwise best with a degreaser and wash off but not sure of best place to dispose of the dirty water.
 
And there was me trying to be good:):)
 
Great work there :thumbsup:
 
Good to see progress being made :thumbsup:
 
HI Faheem,
which model of De Walt impact gun do you have, will it undo wheel bolts easily?

I bought a Clarke one, that says it will do 450Nm.....Not a chance, it won't even undo my wheel bolts that are torqued up to 120Nm.
It's back with them now while they 'test' it.
I have that too and its useless
 
So the oil filter housing got a very nice clean and put back on today, relatively easily.

Valve cover also got a nice clean but I have never had to fight with something as much as I have with the valve cover gasket to try and get it to stay in place.

Each time I try to put the gasket on it just falls off either when I flip the valve cover over or it gets caught on something as the space is very limited once you get past the 4th cylinder. If i try and hold the rubber gasket with my fingers as I turn it over it just comes off from elsewhere!! :mad::mad::mad:

After almost an hour or having the gasket not sitting right I gave up and called it a day as my patience was wearing very thin. :banghead:

Was thinking of using rtv gasket maker to try and secure the rubber gasket to the valve cover, but wanted to know if anyone had experienced similar issues and how they worked around it.
 
Well, what started as a simple job to fix a couple of leaky power steering hoses and replace the front wheel bearings has turned into so much more! :whistle:

I've known that my steering rack has been leaking for a few years now but usually I get by topping it up every 6 months. However, after ordering a new reservoir and cooling line I thought it would be a shame to have a leaky rack... :rolleyes:

Steering rack came off, along with the tie rods. The steering rack is off to get refurbished at a place in Wakefield - total cost for that is £160 but the reviews that I've read have been very good so I will see what the work is like when I receive the rack again.

The good news is that as it has been leaking for so long all the pipes and metal work around it including the anti roll bar have basically no rust.

20190714_150024.webp


Then went to remove the steering knuckle assembly but wanted to do it without damaging the ball joint on the control arm (as the control arm is only 3 years old) so removed the control arm with the steering knuckle. Took it to the garden and tried to separate them using heat as I didn't have a ball joint removal tool, after an hour of trying I got frustrated and used a ball joint fork which separated the control arm from the steering knuckle but damaged the ball joint in the process. :( So new control arms are in the post.

20190714_151856.webp

20190714_151841.webp


The allen bolt holding the abs sensor onto the steering knuckle is not budging at all, despite using penetrating fluid / heat, shocking the bolt etc. It is now stripped so will be off to an engineering shop / garage to see if they can remove it.

Then the steering knuckle and anti roll bar are off to get powder coated.

And the following is in the post to hopefully go onto the zed next weekend ;) ...and all I went to do was fix a leaky hose!
upload_2019-7-14_22-40-51.webp


EDIT

Forgot to finish this off -

Frontend refurb completed -

Parts replaced:

  • Hubs
  • Splash shields
  • Steering rack (refurbished)
  • Anti Roll bar powdercoated and uprated polyurethane bushes fitted
  • Control Arms
  • Tie Rod Ends
  • Power steering lines stripped and painted
  • Drop Links
  • Lollipop Bushes changed to polyurethane bushes
  • Power steering front cooling loop
  • Power steering reservoir
20190719_175650.webp

20190722_100438.webp

20190722_100440.webp
 
Last edited:
Been a while since I updated this and to be honest not a lot has happened to the zed over the past year.

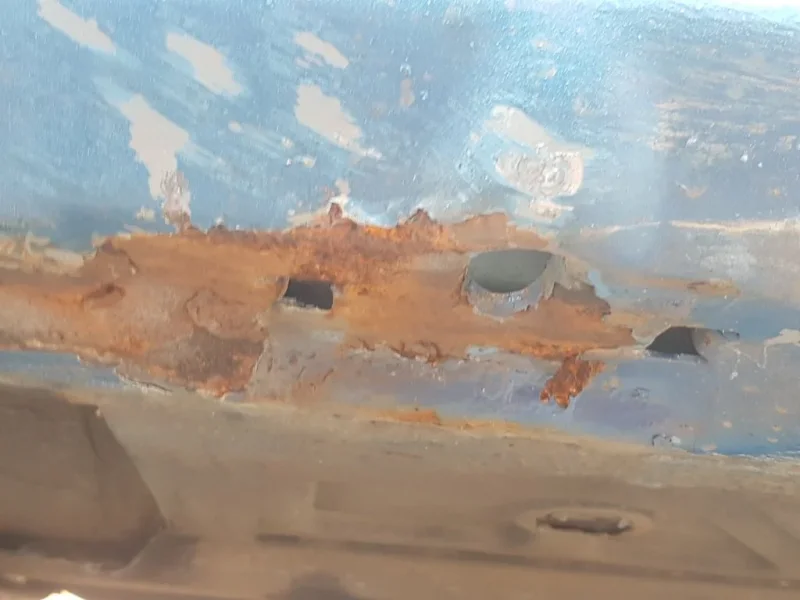
3 years ago I took the passenger sill covers off and gave it a bit of a temporary repair and built the ends up with some body filler which has held up surprisingly well considering there was nothing behind it supporting it.

Both sill covers have had to come off again as I realised I hadn't done a great job of protecting the actual structural sills underneath. Wanted to get this sorted before the respray and the new sills go on.

Lots of rust on the underside especially behind the jacking points. Some of it has crept underneath the seam sealer so would be hidden unless you removed all the seam sealer.

Thankfully caught just in time as it's all still very solid, now I've started the really fun job of grinding it back down to bare metal, treating it with a rust converter, painting it with metal paint and then hopefully spraying some sprayable seam sealer to protect the sills and underside from future corrosion.

Going to be an expensive few weeks :rolleyes:

20200626_164456.webp


20200626_164933.webp


20200627_163635.webp


20200628_122953.webp


Offside front once grinded back down to bare metal
20200627_173635.webp


20200627_163629.webp
20200627_163624.webp
 

Attachments

  • 20200628_122953.webp
    20200628_122953.webp
    57.1 KB · Views: 344
Time well worth spending on such a nice car mate. Hope you all keeping well.

Tony.
 
Thanks Tony, I'm all good, been a tough few months with everything that's going on! Hope you're okay...
 
All good here Faheem thank you.:)

Tony.
 
Back
Top