Well, my missus's Z4 succumbed to the renowned roof motor failure last week.
Windows drop, roof unlatches then nothing.
So I set about a repair and decided to photograph what I did to get it, not only working, but relocated as well.
The main problem with the Z4 roof motor is its location.
The motor, surrounded by some sound proofing foam, sits in its own small black plastic housing,
This housing is tie-wrapped into a plastic moulded compartment just behind the L/H door (UK passenger side)
There is a drain hole in the bottom of the compartment, which can become blocked. The compartment will eventually fill with water, from rain and/or washing. and the water then spills into the motor housing.
The problem is this.
Imagine you have a bucket with a drain hole, (that is the plastic compartment behind the door).
Put a cup inside your nice dry bucket, (the cup is the motor housing)
Now put a motor into the cup
If you now plug the drain hole and start filling the bucket with water, eventually the level reaches the top of the cup, and the cup also fills with water.
Now unblock your drain hole and the bucket empties, but the cup does not.
No amount of further unblocking and keeping the drain hole clear will empty the cup, and that is exactly what happens to the Z4 motor, as it sits and slowly rusts away whilst remaining submerged. And it only has to fill once.
So here is the (second) way I did it: (other methods are available.... )
)
I know! I removed a roof once to do this on a previous Z4.
First job is to remove the parcel shelf.
To do this, squeeze together and push upwards the plastic clips. There are two on each side of the parcel shelf:

The clips will probably fall down the sides, but you can get them later,
Pull the fabric flap off the shelf:
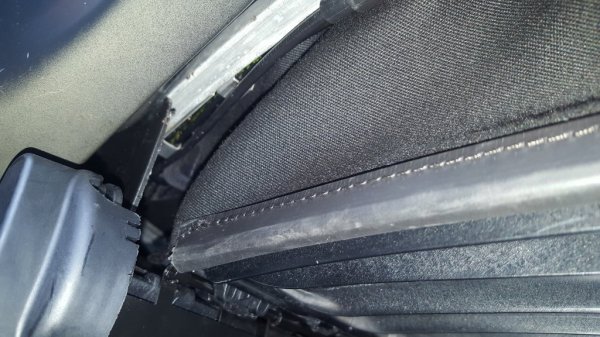

Now pull each hinge upper plate away from the parcel shelf towards the centre of the boot:
this is best done with the parcel shelf in the upper position

Remove the parcel shelf by moving it towards the drivers side as far as it can go, and pulling the other end out. Then you can rescue any clips that you pinged off earlier.
Now you can remove the complete LHS hinge assembly for the parcel shelf.
Remove the Torx bolt at the front, and the bolt at the back.

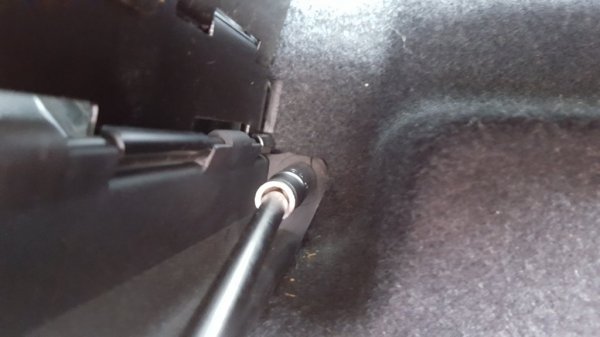
There is also a rivet, in the now viewable plastic well.
Pull the centre of the rivet out with some pliers, and then remove the outer washer:
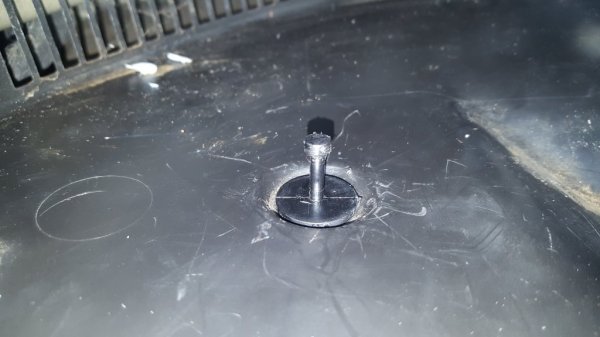
Now give the whole hinge assembly a good pull towards the middle of the car to remove it. A little hump shape underneath it provides some resistance, but otherwise it just needs a bit of effort.
Now you can see all the way into the well and behind the door latch is the dreaded motor in its housing:

cut the tie wraps to release the hoses
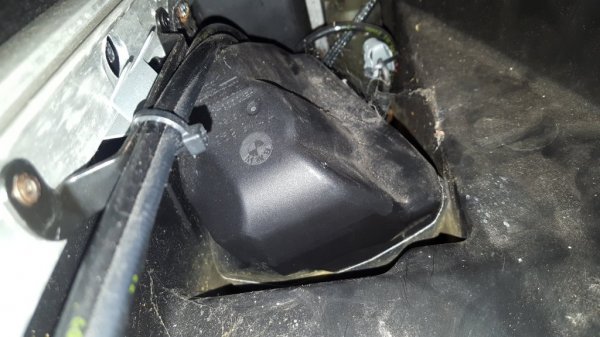
By lying on my back in the boot with both arms above my head and through into the compartment I was able to wiggle the housing about.
It is held in place by two tie wraps around the ram which is nearest the door, and on the RHS of the housing. But I could not get it to shift. I even tried from the door end but that was worse and just wasted time taking off the plastic cover and speaker compartments behind the seat. None of that is needed by the way, Everything can be done from the boot.
So what I eventually ended up doing was separating the motor housing,
The housing comes in two parts (see later photo's). It is held together with some black fabric tape.
I was able to pick at the tape and pull a lot of it off. Then with a long bar I was able to separate the top of the housing from the tie wrapped bottom section exposing the pump.

From then on I could pull out the pump/motor assembly, and finally wrench the bottom of the housing out.
The motor was soaked and rusty,
and the bottom housing was full of the dirtiest water imaginable, that could run down my face as I tipped it up in the boot over myself.....!

With the motor pulled into the boot you can see the ram and associated hoses to it, Try not to pull too hard on these:
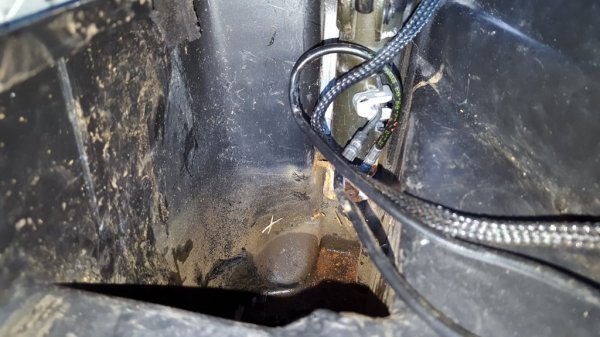
Now you can see (with a camera) the bottom of the plastic well and the drain hole. Note the rusty water tide mark:

The housing looks as follows, with the tiewraps on the plastic fin which breaks away eventually:

You can see the remainder of the fabric tape that I couldnt get too
and inside is the sound proofing which stays soaked:

You can separate the motor from the pump by removing 2 allen bolts, but do this with the pump downwards and break the joint nearest the motor or you will lose hydraulic oil (ask me how I know)
With a quick wipe down and wire brush, I then sprayed WD40 all over it and inside it. then connected to a 12v power supply and it immediately came back to life so I ran it in both directions whilst still oiling it.
Sorry no pictures for that.
After putting it back together and topping up with hydraulic jack oil through the little plug in the top of the pump. (check level with roof down) I was able to get the roof up and down fully with no noises,
To operate the roof you have to temporarily press in the parcelshelf position microswitch (i used a 12mm socket for that):
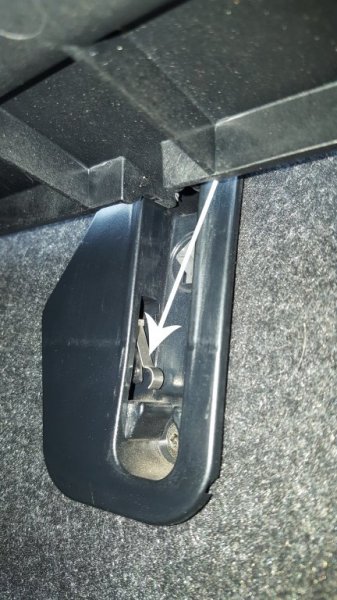
The hoses that now go to the motor have to be routed across the plastic well and below the hinge. This involved cutting the plastic away and securing as follows:
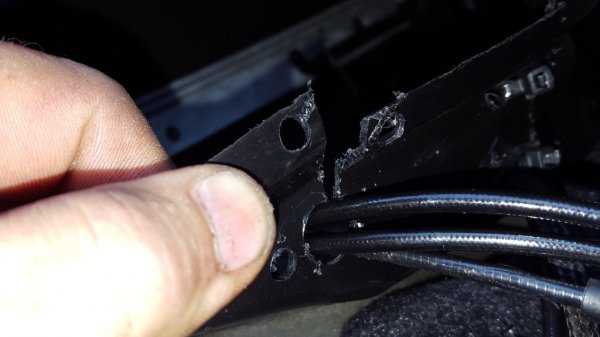
The hinge assembly had to have the same treatment before being refitted:
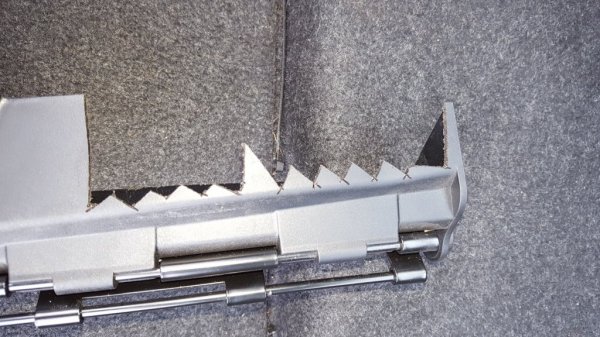
Then time to rebuild:
I pulled out the LHS carpet from the side of the boot to be able to locate the motor.
I tiewrapped the dried out soundproofing around the motor and tied it to a little connector block which is under the LHS side carpet:
Keeping the motor underneath and the pump uppermost:

Then just wrap the carpet back around,
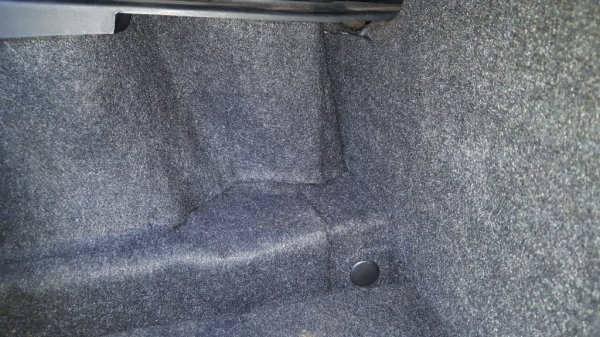
refit the parcel shelf and fiddly clips, and finally the fabric flap.
and most importantly have a beer, knowing that it will no longer get wet, It is easy to get to, and top up if required.
Over 2 grand to fix from BMW,
I did it for free.
Windows drop, roof unlatches then nothing.
So I set about a repair and decided to photograph what I did to get it, not only working, but relocated as well.
The main problem with the Z4 roof motor is its location.
The motor, surrounded by some sound proofing foam, sits in its own small black plastic housing,
This housing is tie-wrapped into a plastic moulded compartment just behind the L/H door (UK passenger side)
There is a drain hole in the bottom of the compartment, which can become blocked. The compartment will eventually fill with water, from rain and/or washing. and the water then spills into the motor housing.
The problem is this.
Imagine you have a bucket with a drain hole, (that is the plastic compartment behind the door).
Put a cup inside your nice dry bucket, (the cup is the motor housing)
Now put a motor into the cup
If you now plug the drain hole and start filling the bucket with water, eventually the level reaches the top of the cup, and the cup also fills with water.
Now unblock your drain hole and the bucket empties, but the cup does not.
No amount of further unblocking and keeping the drain hole clear will empty the cup, and that is exactly what happens to the Z4 motor, as it sits and slowly rusts away whilst remaining submerged. And it only has to fill once.
So here is the (second) way I did it: (other methods are available....
 )
)I know! I removed a roof once to do this on a previous Z4.
First job is to remove the parcel shelf.
To do this, squeeze together and push upwards the plastic clips. There are two on each side of the parcel shelf:

The clips will probably fall down the sides, but you can get them later,
Pull the fabric flap off the shelf:


Now pull each hinge upper plate away from the parcel shelf towards the centre of the boot:
this is best done with the parcel shelf in the upper position

Remove the parcel shelf by moving it towards the drivers side as far as it can go, and pulling the other end out. Then you can rescue any clips that you pinged off earlier.
Now you can remove the complete LHS hinge assembly for the parcel shelf.
Remove the Torx bolt at the front, and the bolt at the back.


There is also a rivet, in the now viewable plastic well.
Pull the centre of the rivet out with some pliers, and then remove the outer washer:

Now give the whole hinge assembly a good pull towards the middle of the car to remove it. A little hump shape underneath it provides some resistance, but otherwise it just needs a bit of effort.
Now you can see all the way into the well and behind the door latch is the dreaded motor in its housing:

cut the tie wraps to release the hoses

By lying on my back in the boot with both arms above my head and through into the compartment I was able to wiggle the housing about.
It is held in place by two tie wraps around the ram which is nearest the door, and on the RHS of the housing. But I could not get it to shift. I even tried from the door end but that was worse and just wasted time taking off the plastic cover and speaker compartments behind the seat. None of that is needed by the way, Everything can be done from the boot.
So what I eventually ended up doing was separating the motor housing,
The housing comes in two parts (see later photo's). It is held together with some black fabric tape.
I was able to pick at the tape and pull a lot of it off. Then with a long bar I was able to separate the top of the housing from the tie wrapped bottom section exposing the pump.

From then on I could pull out the pump/motor assembly, and finally wrench the bottom of the housing out.
The motor was soaked and rusty,
and the bottom housing was full of the dirtiest water imaginable, that could run down my face as I tipped it up in the boot over myself.....!

With the motor pulled into the boot you can see the ram and associated hoses to it, Try not to pull too hard on these:

Now you can see (with a camera) the bottom of the plastic well and the drain hole. Note the rusty water tide mark:

The housing looks as follows, with the tiewraps on the plastic fin which breaks away eventually:

You can see the remainder of the fabric tape that I couldnt get too
and inside is the sound proofing which stays soaked:

You can separate the motor from the pump by removing 2 allen bolts, but do this with the pump downwards and break the joint nearest the motor or you will lose hydraulic oil (ask me how I know)
With a quick wipe down and wire brush, I then sprayed WD40 all over it and inside it. then connected to a 12v power supply and it immediately came back to life so I ran it in both directions whilst still oiling it.
Sorry no pictures for that.
After putting it back together and topping up with hydraulic jack oil through the little plug in the top of the pump. (check level with roof down) I was able to get the roof up and down fully with no noises,
To operate the roof you have to temporarily press in the parcelshelf position microswitch (i used a 12mm socket for that):

The hoses that now go to the motor have to be routed across the plastic well and below the hinge. This involved cutting the plastic away and securing as follows:

The hinge assembly had to have the same treatment before being refitted:

Then time to rebuild:
I pulled out the LHS carpet from the side of the boot to be able to locate the motor.
I tiewrapped the dried out soundproofing around the motor and tied it to a little connector block which is under the LHS side carpet:
Keeping the motor underneath and the pump uppermost:

Then just wrap the carpet back around,

refit the parcel shelf and fiddly clips, and finally the fabric flap.
and most importantly have a beer, knowing that it will no longer get wet, It is easy to get to, and top up if required.
Over 2 grand to fix from BMW,
I did it for free.
Last edited:


