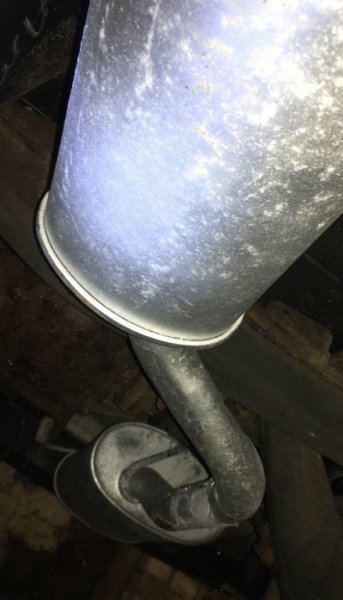
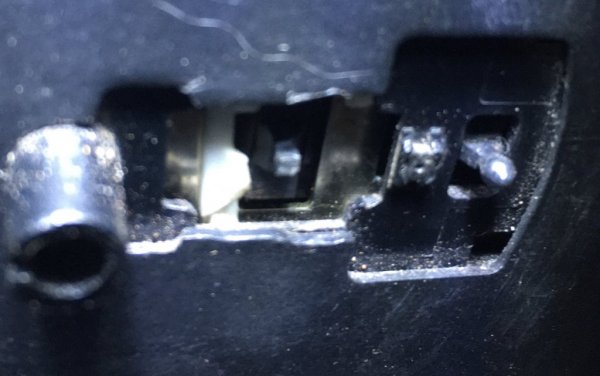
Seemed like a good idea at the time!

t-tony

Zorg Expert (II)
Supporter
British Zeds
#ZedShed
Joined
Dec 31, 2013
Points
226
Location
Torksey Lock,Lincoln, England
Model of Z
E89 Z4 23i Auto
Well I'm nhs, so I'm just waiting on it kicking off, then I'll likely get redeployed to pretty much anything.
No pressure to get it mot'd, now that no track days until at least May. I may take more bits off to modify at home, and I'd really like to start making a front splitter.

Lots of unknowns Iian.;)

Tony.
 

IainP

Zorg Guru (II)
British Zeds
Joined
Feb 20, 2019
Points
119
Location
Out of my Tree, North of Perth, Scotland
Model of Z
1.9
Indeed @t-tony , I'm on annual leave this week, then 2 days on a rota next week apparently, technically on call the other days with redeployment "depending on how. . . develops".
At least I'll have a clean daily, not been washed since last June.
Soooo, in amongst everything else I'm attacking the carbon skinning.
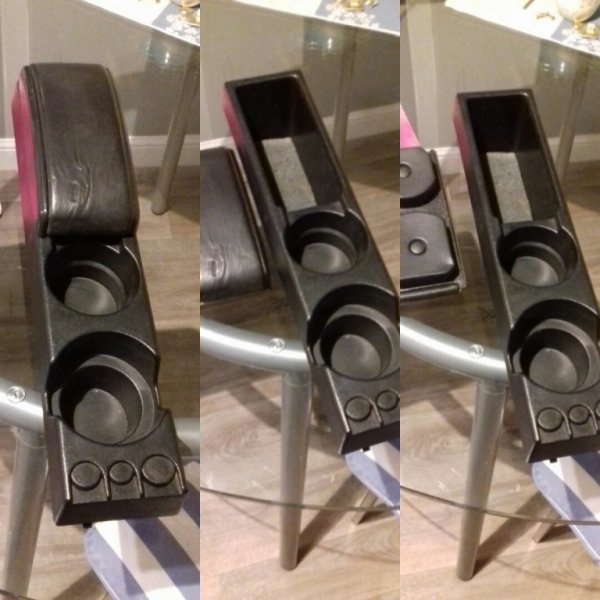
Oh, and I scored this off evil bay, I'd never seen one with the little pad before. Won't fit mine now I've modified it, but I have a use.

IMG_20200324_204749.jpg

The coil cover didn't work, couldn't get enough definition on the 'BMW' so I stripped it, which took a fair bit of effort, nice to know. Removed the letters with a sharp chisel. This is it, and a few other bits, ready for another go. Thin flexible plastics you have to score deeply to give the resin something to grip. It's not seen once the fabric is on.

IMG_20200324_204855.jpg
The lighter socket annoys me, will be relocating to the passenger footwell. Filled it, though had to do it twice, the plastic was cracked so the filler was moving during sanding. Ended up removing it, drilling round the recess and inserting a few screws so the new filler stays secure.
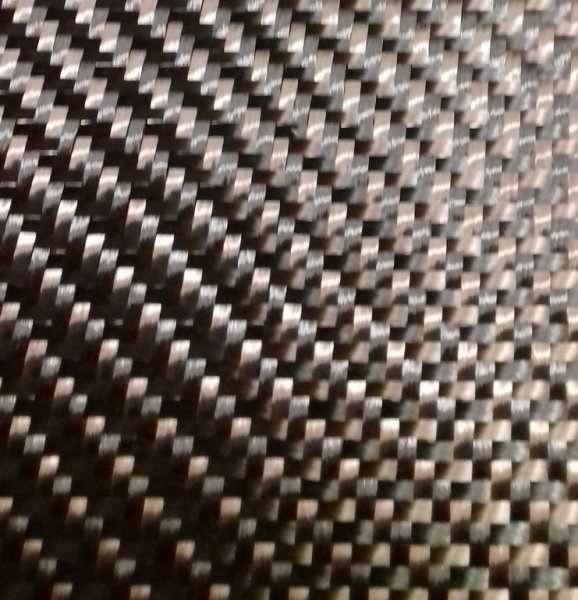
The Pro Carbon material is lovely, specifically made for skinning as it has extra binders in it, I'm trying the fuse box cover in that. The rest I'm trying with carbon/black twaron. Twaron is the generic name for Kevlar, which is a DuPont trademark. Black twaron is dyed, carbon isn't really black, it's brown/grey depending on how your colour vision is. Carbon/black twaron gives loads of contrast. As a decorative fabric it's pretty much Super Carbon. Perfect for the interior.

20200324_204916-1.jpg
Trying it in about an hour once the black resin coating gets tacky.
 

IainP

Zorg Guru (II)
British Zeds
Joined
Feb 20, 2019
Points
119
Location
Out of my Tree, North of Perth, Scotland
Model of Z
1.9
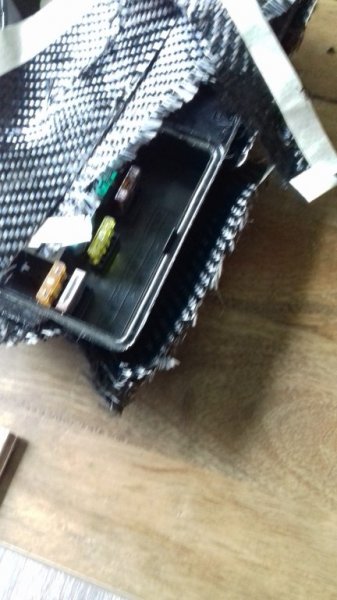
Only one disaster, I cut the fabric for the fuse box cover a little too neat, didn't have enough excess at the edges to fold them over and hold with masking tape. They sprung overnight, stripped it, I'll need to do that again.
20200325_160535.jpg
Everything else turned out well, now on its second coat of resin. Tomorrow I can properly trim all the edges, do a little flatting, then another 3 coats of resin on Friday. You have to recoat at the tacky stage, about 2 hours.
IMG_20200325_212619.jpg

If you fancy trying something like this yourself, a few tips:

If you want to use carbon or carbon/twaron you need carbon shears. Dress making shears won't cut it. Literally.

Do read the instructions, at least 3 times. Do watch online videos - from professionals.

Black Diolen looks so like carbon only the experienced can tell the difference. It's 1/4 the price of carbon and will cut, just, with good quality dress making shears. If you have to buy shears though, just buy carbon ones.

Don't be overly ambitious with your first project.

Do NOT wear safety glasses when cutting carbon. Wear goggles. The dust is Really Sharp and Irritating. Think loft insulation on steroids. You'll only make that mistake once.
 

IainP

Zorg Guru (II)
British Zeds
Joined
Feb 20, 2019
Points
119
Location
Out of my Tree, North of Perth, Scotland
Model of Z
1.9
I really shold add to this.

Still sitting at my father in law's without Mot, with him being in his 80's, shielding and all the quarantine goings on I really couldn't spend any time there.
Took various bits off when I was able and gotten some things done though.
The carbon engine covers look great.

20200504_094948-1.jpg

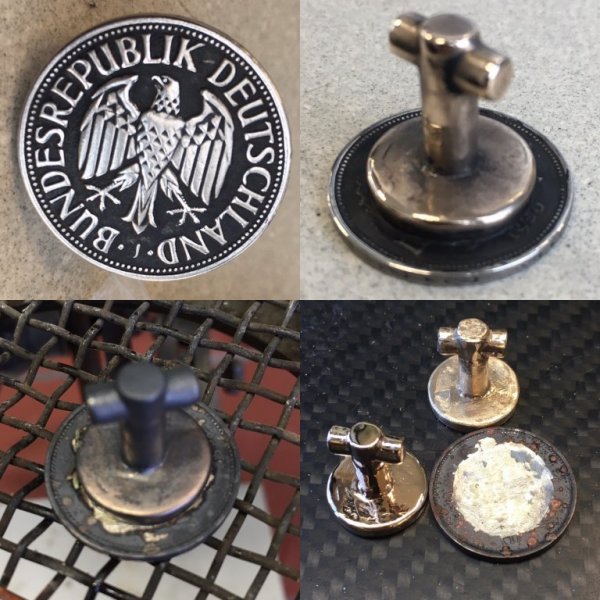
I tried making the retaining clips in chrome and it was a total disaster. Ended up using 1dm coins. That actually worked really well. I just have to drill a small screwdriver slot. That has to wait until I rescue them, dropped them behind my drilling machine and I can't move it at the moment.
34B3108F-4E39-4B30-A53E-1EBB87B14FA9.jpeg
Managed to get the exhaust a nd few other things off in the summer.
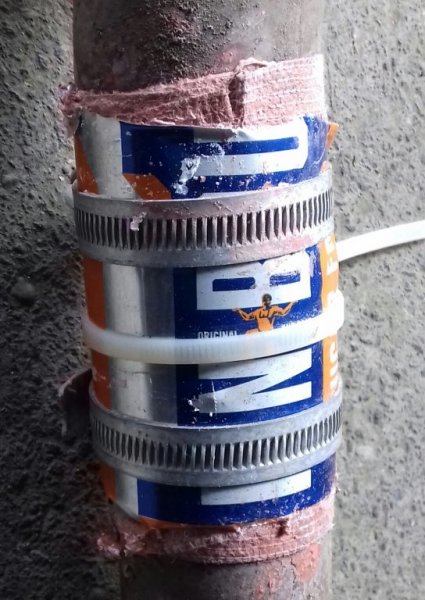
The quick Irn Bru repair worked well.

20200504_111643-1.jpg

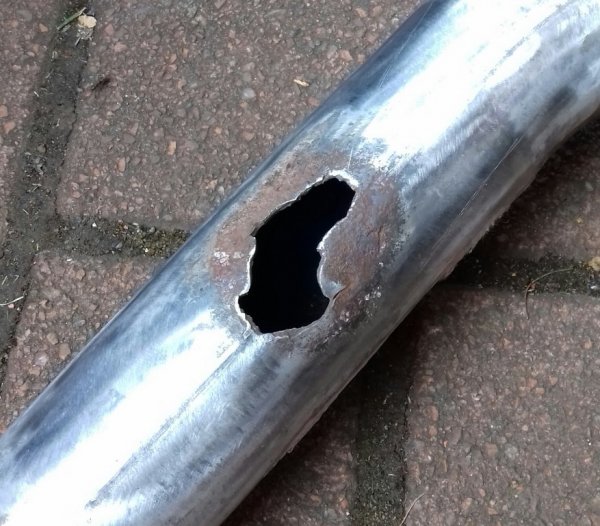
All zap with a flap disc showed why it was loud!
20200507_170058-1.jpg

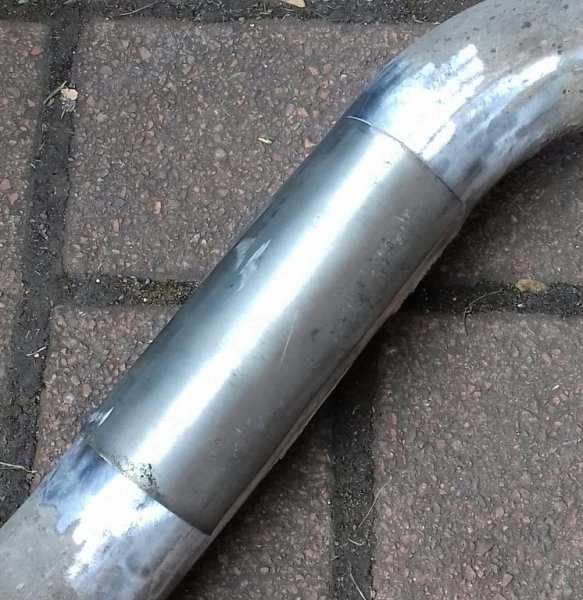
I have a few bits of stainless tube, didn't take long to make a repair patch.
20200507_170115-1.jpg

The center support is missing, obviously hanging down, so, rather than just using a bit of baling wire, it was taken off and the crap beaten out of it. I really don't understand some people.
 

Attachments

Last edited:

IainP

Zorg Guru (II)
British Zeds
Joined
Feb 20, 2019
Points
119
Location
Out of my Tree, North of Perth, Scotland
Model of Z
1.9
Whilst battering the crap out of the exhaust, chummy also managed to put 3 cracks in the boxes. I elected to just weld them up since the exhaust isn't really in bad condition.
20200504_112034-1.jpg

I'll add something to hold the center up later.

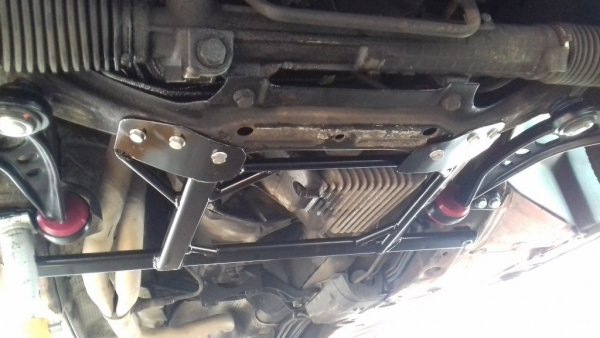
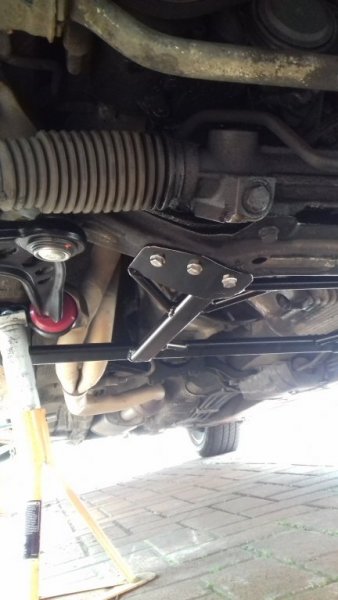
When my son was home after 1st lockdown I made a lower brace for his touring. Really wish I'd made a copy for the Z, much more robust than the standard item.

20200719_162714.jpg
20200719_162643.jpg

I'd bought a strut brace from a 6 Cyl just out of curiosity, but it was far too far out, I'll get round to making one eventually.

20200504_095745-1.jpg
 
Last edited:

t-tony

Zorg Expert (II)
Supporter
British Zeds
#ZedShed
Joined
Dec 31, 2013
Points
226
Location
Torksey Lock,Lincoln, England
Model of Z
E89 Z4 23i Auto
The X-brace you made looks a fine piece of work Iain:thumbsup:

Tony.
 

IainP

Zorg Guru (II)
British Zeds
Joined
Feb 20, 2019
Points
119
Location
Out of my Tree, North of Perth, Scotland
Model of Z
1.9
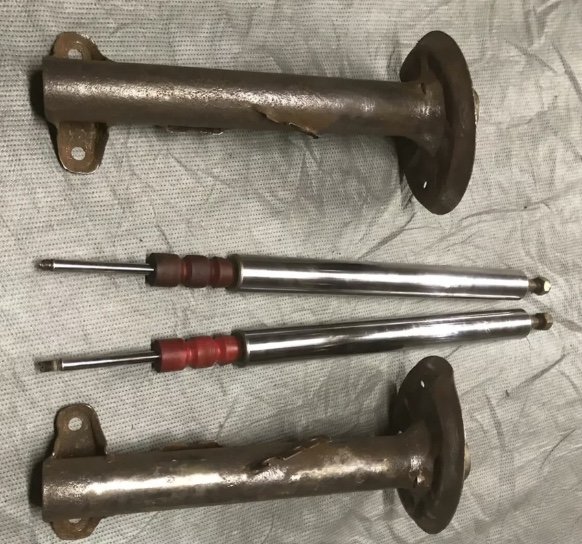
I acquired these before Christmas, e36 Bilstein struts.
0993C2BC-2391-4206-89C0-D2D71D154417.jpeg12189A7F-FDE3-41E2-8000-B55E9C762FD5.jpeg
40mm inverted monotube inserts. The seller stated one was past it. Not had a minute to have more than a cursory look, but nothing like as bad as the advert stated.
One pipe bracket needs remade, dead easy, and one of the platforms needs repair. Again, dead easy. The bushes seem ok, though the seals are shot.
Undecided whether to keep the platforms or, cut them off and weld on adjustable platforms.

I’ll replace the fuel pipes with kunifer these bends are done.
C0D27291-D76C-49C3-BCA6-FF63F681DBC6.jpeg
 

t-tony

Zorg Expert (II)
Supporter
British Zeds
#ZedShed
Joined
Dec 31, 2013
Points
226
Location
Torksey Lock,Lincoln, England
Model of Z
E89 Z4 23i Auto
You should Iain, maybe you could sell these.

Tony.
 

IainP

Zorg Guru (II)
British Zeds
Joined
Feb 20, 2019
Points
119
Location
Out of my Tree, North of Perth, Scotland
Model of Z
1.9
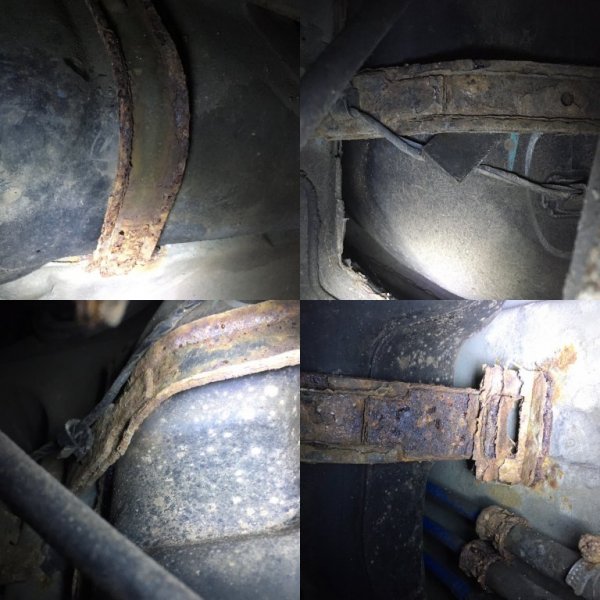
The tank straps aren’t spectacular, but useable. I’d like to drop the full rear when it’s mot’d and I get it back up here, if I do I’ll make new ones and a new mount.
35259749-17FE-4B36-9858-4F89A620EF4D.jpeg
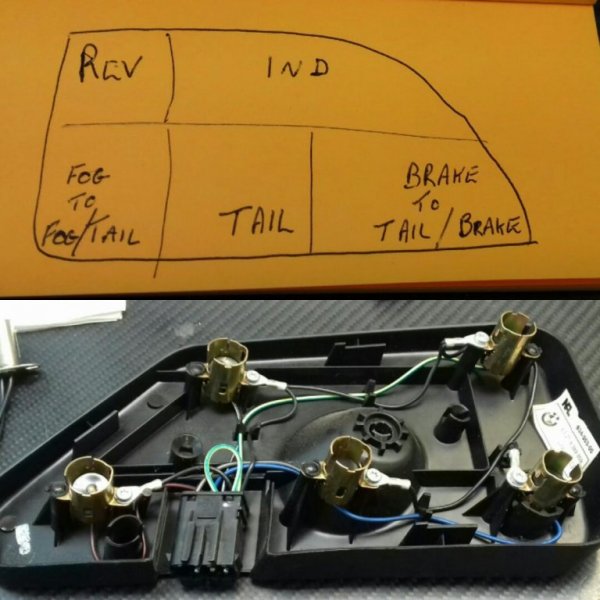
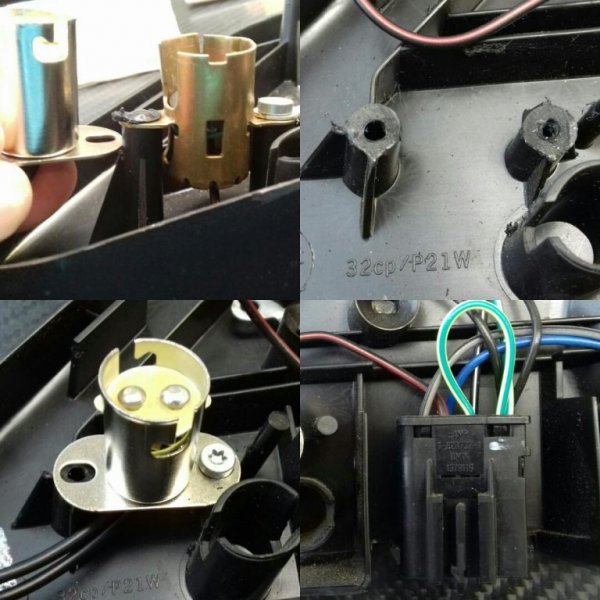
I followed a couple of Z3’s the last 2 winters, not a fan of the pissy wee lights in the deep dark and rain. I drive a lot in the deep dark and I’m not impressed with the twonks on the A9 who now think overtaking at the very last second is a wizard wheeze. Don’t get me started on the clowns who don’t even bother to change lanes. Had a good think and decided to do the same as we did to the back of my sons Touring, repurpose/rewire the rear lights. Easier on a Z3 as its wires and holders, not a board.
The fog becomes tail/fog and the brake becomes stop/tail giving 3 tail lights. I’d rather have 2 brake lights but Construction and Use regs demand 10cm distance between a fog and brake light. Can’t achieve that in the standard housing. If I can eventually find a small and neat enough led strip, the fog will be relocated above the number plate.D89DD535-86C5-44FC-ACDA-4FFE448DA0DC.jpeg53C91ADE-31CB-454A-A81C-E613AF078E01.jpegF1D1D310-0801-46C9-A40B-FBD81E1178FD.jpegADF17D37-7904-44F1-B53D-B57CA8160B11.jpeg
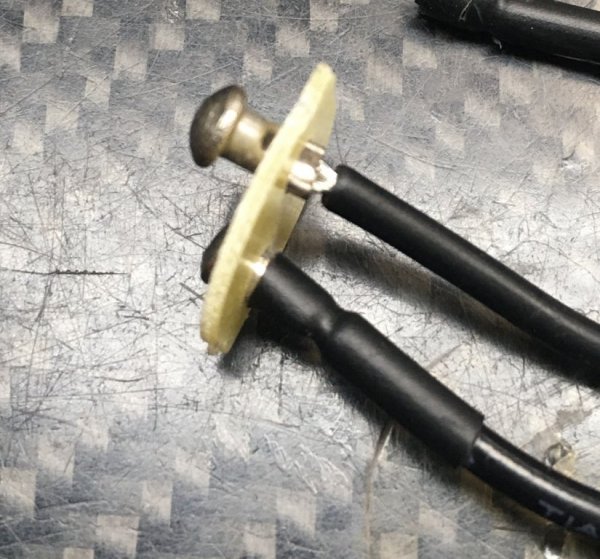
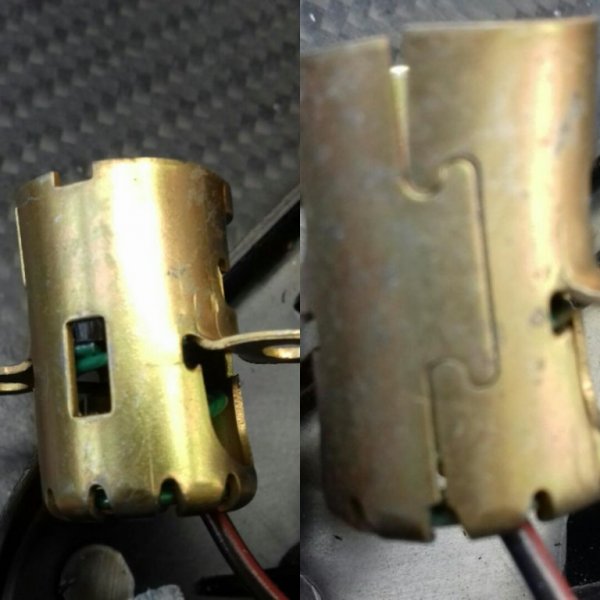
Just waiting on new rivets. Oh, and some new screws. I did think of recutting the holders rather than replacing them, but it would be quite time consuming and I’d need to remove them to do that properly anyway.
 

t-tony

Zorg Expert (II)
Supporter
British Zeds
#ZedShed
Joined
Dec 31, 2013
Points
226
Location
Torksey Lock,Lincoln, England
Model of Z
E89 Z4 23i Auto
I doubt very much that anyone would pick up on the fact there should be 10cm between Rear Fog light and stop light. How did you come by that piece of info? So long as lights illuminated when switched on and tell-tale lights worked I would bet it would pass an MOT test.

Tony.
 

IainP

Zorg Guru (II)
British Zeds
Joined
Feb 20, 2019
Points
119
Location
Out of my Tree, North of Perth, Scotland
Model of Z
1.9
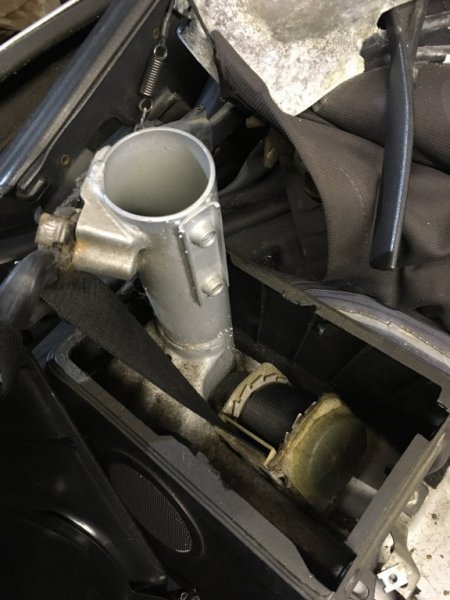
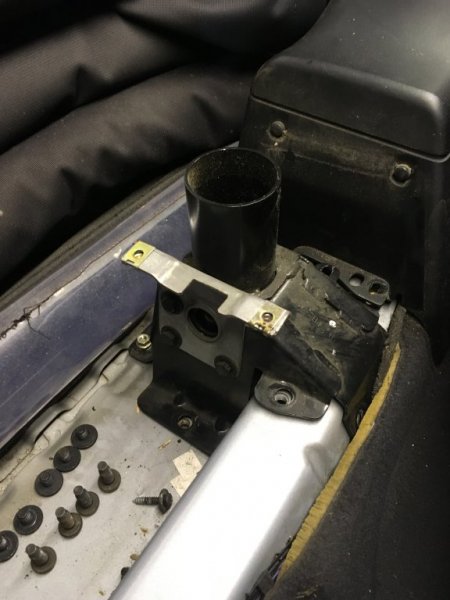
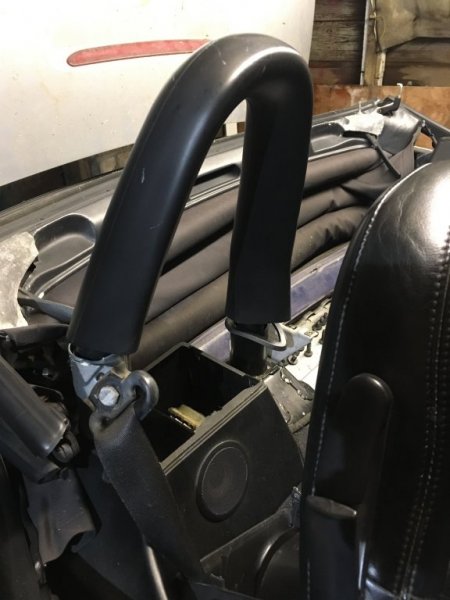
I wanted to do a few track days, that didn’t happen at all last year, we’ll see what happens this year. I’m also planning a Sprint or Hillclimb. So, Rollbar (or rop, roll over protection). I couldn’t come up with a design that would meet MUK rops regulations, yet clear the seatbelt mount and still allow the hood to fold properly. Rops isn’t mandatory on road cars, rollovers aren’t common, but not unknown, I’ve come close before. I’ll come up with a design eventually.
Which leaves the standard sissy bar things. Better than nothing. Maybe. I mean they come with a built in fold point for goodness sake.
I couldn’t believe what they were going for on eBay. £300 min for all the bits. Feck that. I got a pair with brackets from the States, £77, £146 all in with Global Carriage and tax.
The plastics in this car aren’t for bars. Good thing I have a decent saw and plenty of epoxy.
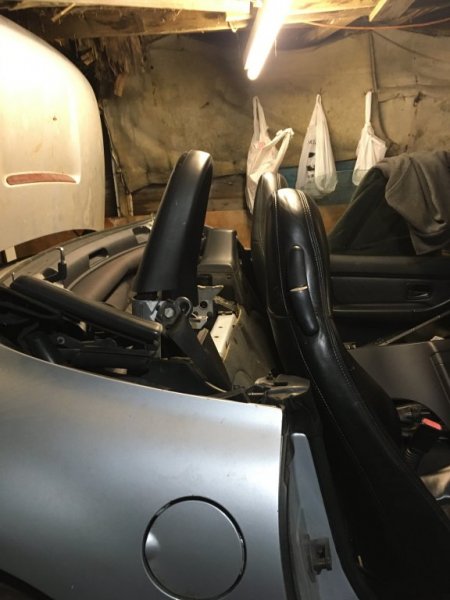
252E1E97-C14C-4B7A-8613-3754AC7A4538.jpeg4B3888F3-6D3D-4692-BC9C-7BA5420FD86F.jpegE14E6265-3BC0-4386-A8E0-9EEE44AF7705.jpeg48F79D0E-04FE-4DD0-B5D6-CD6911D56B00.jpegAF41D970-9BBE-4DBA-AD10-1DBDAD74A4CC.jpeg6A3EFD3A-102C-4799-A51F-FCD012A40044.jpeg


With a lid on there’s really not going to be a great deal of clearance, I may have to go to a race seat. Five layers of clothing don’t help, -2C when that pic was taken. I plan on losing another 7kg off me. I need to figure out where to fit harness mounts.
And the roof isn’t low, the car is as high as the jack stands go.
 
Last edited:

IainP

Zorg Guru (II)
British Zeds
Joined
Feb 20, 2019
Points
119
Location
Out of my Tree, North of Perth, Scotland
Model of Z
1.9
I doubt very much that anyone would pick up on the fact there should be 10cm between Rear Fog light and stop light. How did you come by that piece of info? So long as lights illuminated when switched on and tell-tale lights worked I would bet it would pass an MOT test.

Tony.
I have had a couple of Pontiac over the years Tony, one was very badly wired, came up when I was researching what I could legally do with the lights front and rear.
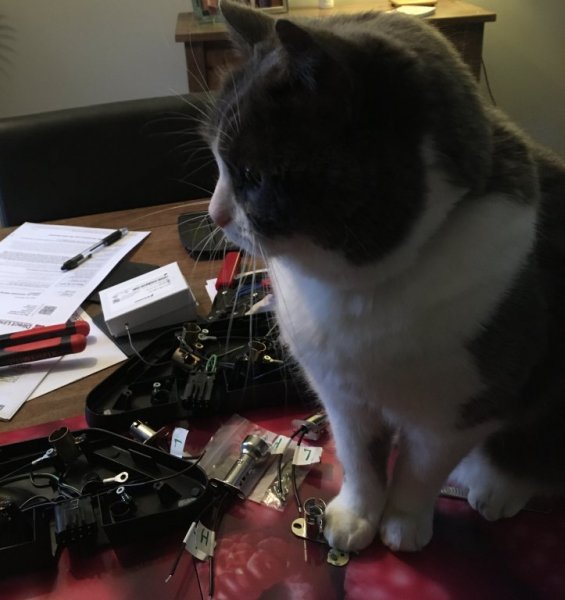
I have a helper, sort of
;-)

2B14E1BA-CFBC-473E-9C24-A118C97F098F.jpeg
Lucky he didn’t get a soldering iron up his arse.
 

IainP

Zorg Guru (II)
British Zeds
Joined
Feb 20, 2019
Points
119
Location
Out of my Tree, North of Perth, Scotland
Model of Z
1.9
Got the exhaust back on, I can’t push the center up, I think the whole thing is bent. It didn’t ground on anything last year so should be fine for the moment. If I can get some 45mm stainless tube I may run twin pipes instead of one standard one. I only have the one die for my tube bender, will see what I can find.
if you’re wondering why I’m making a distinction between tube and pipe, tube is sized on its o.d., pipe on its internal diameter. You can’t bend pipe with a tube bender, you can bend tube with a pipe bender but it mostly kinks and flattens.
8823520B-9F00-44A1-8404-17214D6C4C8F.jpeg

Spotted I have a gearbox leak. It’s only slight, fine for now. Perfect excuse for a 6 speed conversion in the future. The clutch was shuddering badly when I moved the car from the open garage under cover. Luckily my father in laws drive is long, booting it and dumping the clutch cleaned it a little, still shudders but should be drivable. A lightweight flywheel should complement the 6 speed. Both will wait until I track down all the parts.
B73DC55F-5854-48EA-B906-E4A5D00CA0E9.jpeg
Removed the headlights, I have some projectors to fit in them and they need polished anyway, easier to do that off the car.
 

IainP

Zorg Guru (II)
British Zeds
Joined
Feb 20, 2019
Points
119
Location
Out of my Tree, North of Perth, Scotland
Model of Z
1.9
The rivets I need for the bulb holders arrived. I could have just joined wires but it’s messy. Checked and marked each bulb holder . . Because I’m a Knob . . I mix things up. Tried soldering the old wires into the rivets but the wires don’t clean enough to tin, even with several chemical cleans. So, crimped them.
Now thinking of replacing the terminal supplying the taillight. I have spares somewhere. Then I can solder that properly.
30AF1216-6468-4159-BD09-878BF6C22A29.jpeg7119BDD3-2CD5-4204-B9D0-78AD0C14C767.jpeg957B4EFB-AFA6-441B-B8BF-4D69774E6364.jpeg
Attacked the headlights, have one cover off to be repolished, I’ll do the other tomorrow night. Bought a 2 1/2” bi-halogen kit just after buying the car, didn’t have time to fit that before it went to my son, they’ll go in the main beam. A 3” bi-halogen kit will go in the dipped headlight position. The holders need trimmed to allow a nice tight fit, which will be Loctited and epoxied to death, I don’t want anything vibrating or loosening. I really should have taken the back off the light too, that’s how you get the glass out. I just snapped it, with modified holders it couldn’t be reinstated anyway. I’ll use the glass as patterns to make carbon trim pieces.

1D909FE1-E43B-496E-B40D-6085941BE83B.jpeg6B38B975-0ECD-4308-8940-3D6F702CAC17.jpegA8F52757-27AB-4F40-9B14-B5DA32FEACE4.jpeg
These arrived today, 300mm diameter of vented, dimpled, grooved, stoppy goodness. Just have to get the correct brackets.
24C312EF-5CB8-4C97-AC57-941068A994F4.jpeg
 

IainP

Zorg Guru (II)
British Zeds
Joined
Feb 20, 2019
Points
119
Location
Out of my Tree, North of Perth, Scotland
Model of Z
1.9
Load plasticky cutting noises . .
“Iain, what the hell are you cutting? Oh my Freaking God! :eek:
That’s a (super sharp diamond cutting disc)! Don’t lose a finger ok, we’re not filling a (NHS accident at work form), there’s no category ‘cutting up headlights with a diamond disc’ ok!”

worked out well

DBF90325-C8A5-49A0-AD5B-C53E364AA777.jpeg
Just need to secure them, add support brackets and sort out the wiring.
 

IainP

Zorg Guru (II)
British Zeds
Joined
Feb 20, 2019
Points
119
Location
Out of my Tree, North of Perth, Scotland
Model of Z
1.9
Feel like having a Basil Fawlty moment and giving this project a damn good thrashing.

Spent ages with the newly wired rear lights chasing a fault only to find it was the brand new, straight out of the box bulb, both filaments intact, but dead on both circuits. Never come across that before.

Got the front mounted in for measuring. Perfect. Measured for shrouds.

IMG_2406[1].JPG
Tried to take them apart to route the wiring, uh oh, don't come apart. Much cursing later I had main beam out, the alloy nut had distorted when tightened. Totally pan bread. Tore the housing to bits too. Measured and ordered new steel half nuts. Which don't fit. It's some 'not quite' size. Arrrgh.
IMG_E2407[1].JPG

IMG_E2411[1].JPG
Not quite sure what I'll need to do now, somehow make that wrecked nut work I think. Started on the mould for the indicator lense, but at this stage I may be buying another headlamp and put this on the back burner, yet again, until I get an Mot.

Spotted a couple of 245 tyres on ebay cheap. Checked my wheel stack, yep, two 8" wheels, tyres arrived and went to fit them. Ohh, ohh feck, these are 8" wheels for an Audi, same fitment as my Pontiac. Shouldn't have been in the BMW stack. Ooops. . Oh well, I now have 2 tyres for the Fiero Project. Admittedly, that one, is not the Bimmers fault!

IMG_E2409[1].JPG

Working on the rear bars, I heard a ripping sound, hmnn, not my ovies, not my jeans, yes, it was the seat. Tore a seam. So that now has to come out. Fore aft motor was dead. Tapping it, rotating it, nothing,, felt strange rotating though. Ended up winding the seat back by hand, no drill available. Took an hour, don't recommend it. At least when i fix the broken seam I can fit seat heaters at the same time.

Seat out, the area below is full of water, so passenger seat now needs to come out to get the carpet out. It has no motor, a broken seat gearbox and, I simply can't remember how I operated it the last time. Arrrgh part 2.

Taking the motor apart, it's obvious why it doesn't work, the brass bushes are completely seized to the spindle, the weird feeling was them rotating in the plastic housing.

IMG_E2399[1].JPG

One of the brushes is breaking up and was jammed in the housing. The other is not much better.
LIKQ9971[1].JPG

I should just buy a S/H motor, but I tapped at the bushes with a plastic, then brass hammer, got them to move, eventually twisted them off with pliers. At this point, if I can make the thing work at all in the short term, it will be a result.. I really need a passenger seat base, there are 3 breaking in and around Glasgow, I'm off a few days next week, need to have a phone, see what I can acquire.

Alumina blasted the spindle, bead blasted it and the bushes, then polished both with soft rubbers for gold.
,IMG_2414[1].JPG

Now spins beautifully. The little dents and the tool marks on the outside of the bushes are of no consequence, they go in the housing. Can't get the correct size brushes so ended up buying a couple slightly bigger, I;ll sand then to the correct size.

IMG_E2414[1].JPG

Now, I just have to figure out how the hell I got the passenger seat out, then back in the last time, with no alloy gearbox attached to the worm drive.
 

IainP

Zorg Guru (II)
British Zeds
Joined
Feb 20, 2019
Points
119
Location
Out of my Tree, North of Perth, Scotland
Model of Z
1.9
With the seat outI spotted the tip is broken off one of the switches.
472B55B9-B479-49FE-9130-C8D8EB36144D.jpeg
I think rocker switches are in its future.
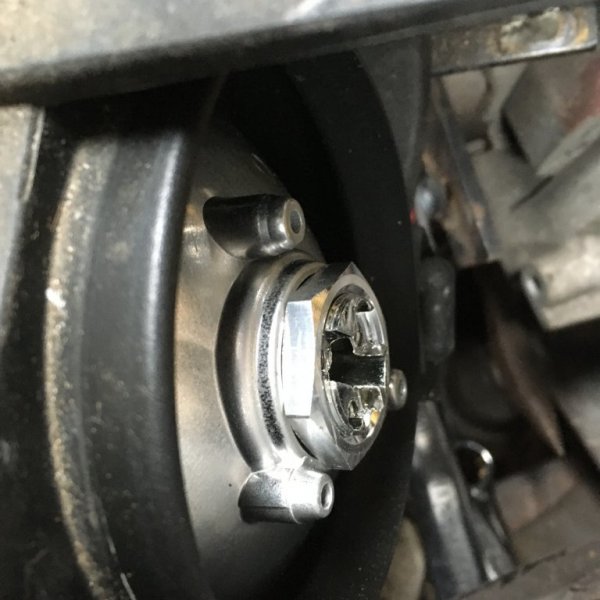
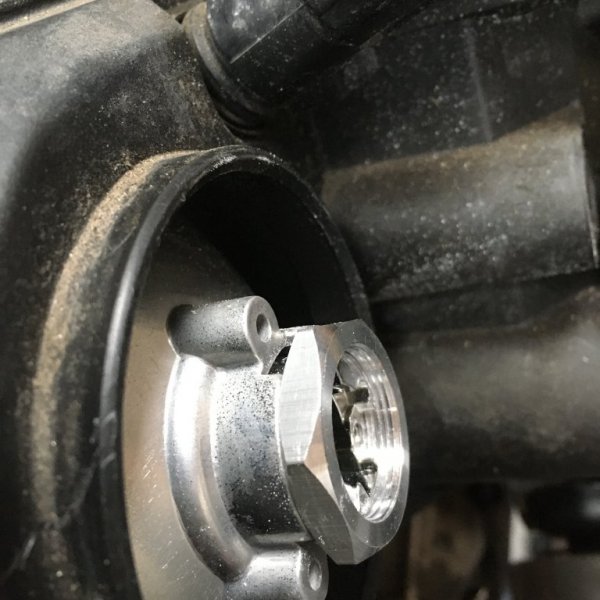
To top it all, I can force the recline mechanism. That in itself is an Mot fail. And dangerous. Bugger. One more thing to fix.
 

IainP

Zorg Guru (II)
British Zeds
Joined
Feb 20, 2019
Points
119
Location
Out of my Tree, North of Perth, Scotland
Model of Z
1.9
Spotted a decent organiser box whilst in Lidl, been meaning to organise my electrical box for, well, years really. Started off just for wire and crimping tools, eventually terminals, switches and connectors ended up in there.
An hour or so, and I can now close the box on the first go, rather than repack it about 5 times.
The new brushes for my dodgy motor turned up. Almost a perfect fit but it quickly became apparent it was a no go. The originals are crimped. If I opened the crimp the new wires were too short. If I soldered them they just might fit. Soldering to braided wire covered in and impregnated with carbon. Best of luck. I decided to clean the remains of the brushes with a suitable sized stone, refit and hope for the best. It Lives. Smooth and quite quick too, excellent. Just needs to work until it’s Mot’d.
I got a one side of gen corner splitters off the bay, spent the afternoon with Trnio, trying to use my phone to scan it, without success, stupidly deleted all the pics I took of the motors trying to clean everything up.
 
Top