Bimmer Z3 Widebody

Kash3838

Dedicated Member
Joined
Aug 14, 2019
Points
30
Location
Cardiff
Model of Z
2.2
Ok...
This is a build thread for my Z3
2.2
2001
Mileage 55k
Sapphire black metallic

Spec when bought:
Totally standard.
BBS style 42 splits in 17" staggered
Red leather interior
Heated seats
Here are a couple of pics of the car when I got it 3 months ago
Screenshot_20190421_172303_com.gumtree.android.webp
Screenshot_20190421_183826_com.gumtree.android.webp
Screenshot_20190421_183820_com.gumtree.android.webp
Screenshot_20190421_172310_com.gumtree.android.webp
 
Last edited:
The first thing to do with the car was a full on detail...
30 hours spent.... Engine degrease, clay bar wash, compound with 3 levels of compound, polish wax sealant topped of with hydrosilix ceramic coating .
IMG_20190506_164024.webp
IMG_20190506_164029.webp
IMG_20190428_121731.webp
IMG_20190428_121727.webp
IMG_20190428_121721.webp
IMG_20190428_121716.webp
IMG_20190428_121713.webp
IMG_20190428_121709.webp
IMG_20190428_121657.webp
IMG_20190506_164029.webp
IMG_20190506_164024.webp

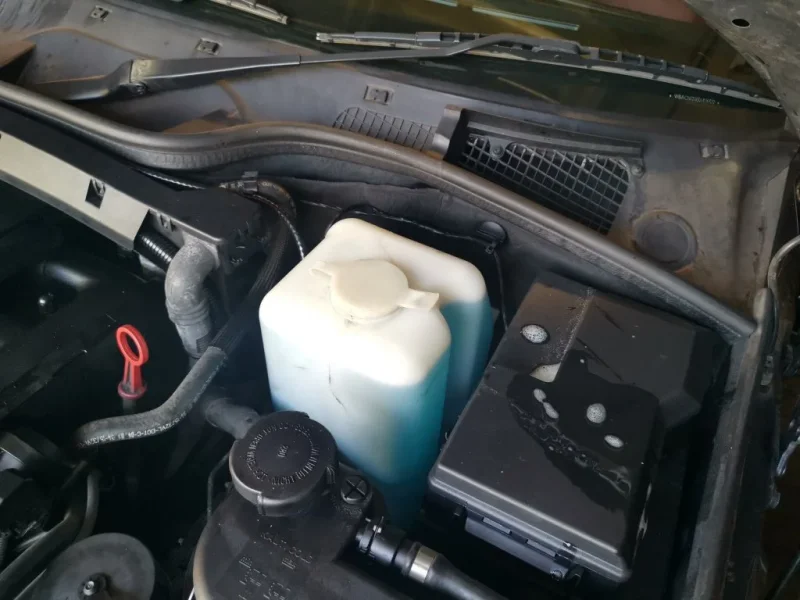
While I was in the engine I found the bracket for the washer bottle had snapped of at some point... Common failure. So I plastic welded this and as I had it out I cleaned behind.
IMG_20190501_130814.webp
IMG_20190506_164024.webp
IMG_20190506_164029.webp
IMG_20190428_121731.webp
IMG_20190428_121727.webp
IMG_20190428_121721.webp
IMG_20190428_121716.webp
IMG_20190428_121713.webp
IMG_20190428_121709.webp
IMG_20190428_121657.webp
IMG_20190501_130814.webp
IMG_20190504_122808.webp
 

Attachments

  • IMG_20190504_122803.webp
    IMG_20190504_122803.webp
    71 KB · Views: 144
Engine bay squeaky clean... After cleaning the rust spots in all the obvious places were treated and sprayed in the OEM engine colour as well as the underside of the bonnet.
IMG_20190506_163955.webp
IMG_20190506_164001.webp
IMG_20190506_164005.webp
IMG_20190506_164008.webp
IMG_20190506_164012.webp
IMG_20190506_164021.webp
 
I wasn't happy with the soft top... It wasn't leaking but needed bonding on the two corners of the rear screen... And it was a little faded so I decided to re dye and seal the roof.
IMG_20190505_180427.webp
IMG_20190505_180438.webp
IMG_20190505_180447.webp
IMG_20190505_183824.webp
IMG_20190505_183837.webp
IMG_20190505_183858.webp
 
Blimey you've been busy! The hard work is paying off :thumbsup:
 
So this is after the 3 stage compound round, polish and sealant. 30 hours but worth it. The bodywork had never seen any type of polish or sealant. The holograms, buffer trails were really bad. Some Muppet had tried buffing the paint work in this before... But it was a bridge job.... Front and rear bumpers were a bit tough to do... They had seen some paint in previous years... The headlights and rear lights were also cut as they were hazy.
The surface rust on the inside of the arches were also addressed sanded prepped and painted .
IMG_20190519_190005.webp
IMG_20190519_190027.webp
IMG_20190512_165320.webp
IMG_20190512_165237.webp
IMG_20190519_185822.webp
IMG_20190519_185942.webp
IMG_20190519_185840.webp
 
IMG_20190723_150533.webp
Ok, the next bits to do were the front upper strut bar which came from Poland.
The induction was not an off the shelf job.
I made the kit for the K&N Apollo with custom pipework, brackets, I also made a cold air duct replacing the passenger side fog lamp... This engine bay needs a cold air feed otherwise an filter is just getting heat soak.
IMG_20190602_122855.webp
IMG_20190516_000721.webp
IMG_20190526_185137.webp
IMG_20190602_122844.webp
IMG_20190511_130905.webp
IMG_20190601_125410.webp
IMG_20190602_122839.webp
IMG_20190508_135950.webp
IMG_20190602_122835.webp
IMG_20190508_140048.webp
IMG_20190602_122822.webp
IMG_20190602_122855.webp
IMG_20190516_000721.webp
IMG_20190526_185137.webp
IMG_20190602_122844.webp
IMG_20190511_130905.webp
IMG_20190601_125410.webp
IMG_20190602_122839.webp
IMG_20190508_135950.webp
IMG_20190602_122835.webp
IMG_20190508_140048.webp
IMG_20190602_122822.webp
IMG_20190804_191055.webp
IMG_20190707_113712.webp
IMG_20190803_133011.webp
IMG_20190803_133001.webp
 
DISA Valve rebuild.
As this is a common failure I decided to rebuild my disa. Kit bought online from X8R.
It's an uprated kit comprising an aluminium flap and screw in pin.
IMG_20190804_155430.webp
IMG_20190804_160917.webp
IMG_20190804_155439.webp
IMG_20190804_165346.webp
IMG_20190723_113445.webp
 
Next up....
Azev A staggered Wheels
7.5 X 17 front
9.5 X 17 rear

VMaxx sport coilovers
One caliper was changed while the wheels were off as it was sticking. Also hubs, calipers were cleaned and painted up.. also the inner arch liners were thoroughly cleaned and treated .
IMG_20190514_173957.webp
IMG_20190630_173048.webp
IMG_20190526_184934.webp
IMG_20190630_170715.webp
IMG_20190516_134204.webp
 
While all this is going on I'm also refurbing the original BBS splits... This is a time consuming job.
IMG_20190810_124609.webp
IMG_20190810_125200.webp
IMG_20190707_113701.webp
IMG_20190810_124603.webp
 
Front universal lip fitted
Back box delete with 2 stepped out pipes. Had an X pipe / resonator made up. Sounds awesome.
Rims and paintwork ceramic treated.
With a hydrosilix... This was sent to me to test... As it not out yet.. it's a more concentrated formula to before.. I can vouch for that as my other cars have the 1st edition on... This new stuff is a big difference.
All the bulbs were changed inside and out to Cree led... I haven't taken any photos yet of the lights on.
IMG_20190721_125952.webp
IMG_20190721_130207.webp
IMG_20190721_130242.webp
IMG_20190721_125335.webp
 
Ok, this is where I am currently at as of today.... Got a hard top for the car... It needs some work to get it to the level I'll be happy with... So I'll be working on this this week.
IMG_20190818_163756.webp
IMG_20190818_163819.webp
IMG_20190818_175356.webp
IMG_20190818_171953.webp
IMG_20190818_172000.webp
IMG_20190818_155853.webp
IMG_20190818_163745.webp
IMG_20190818_172105.webp
IMG_20190818_172113.webp
IMG_20190818_172028.webp
IMG_20190818_172035.webp
IMG_20190818_172045.webp
IMG_20190818_172059.webp
 
IMG_20191101_103831.webp

Tinted out the standard rear lights... Red bottom and smoke top... Lacquered them up... Another job done... Wasn't a fan of the standard design.
 
IMG_20191006_164601.webp

This is the engine bay spray paint...
The outside paint is sapphire black metallic... So if anyone needs to touch up any engine bay bits this is the code you need. Took some finding out ...
 
IMG_20191006_153927.webp

20mm spacers fitted on the rear for maximum effect.
 
Looks fantastic. I have the same split rims that you refurbished. How did you get on? I am picking up a spare set of wheels hopefully this week and might swap them over to give my spit rims a good clean, or possibly a proper refurb. I have done some normal alloys before but not splits.
 
Still in the process of doing the rims... I'll probably sell them on when I'm done. They are nice but not wide enough for me so I'll stick with the azev a rims.
 
Back
Top