This weekend was spent restoring the spare wheel carrier. Not the most interesting or exciting job - however I was bored and thought to make good use of my time. Whilst not everyone agrees to using the spare wheel, I feel that once restored, if the wheel is properly maintained (i.e. check the pressure once every few months and clean the wheel housing and wheel every few months) it is a good addition to have in case of an emergency. I also carrier a can of tyre weld and an inflator. The reason for keeping the spare wheel and carrier is because I use my zed as a daily driver commuting almost 50 miles every day all whilst having no breakdown cover!
For those that don't know I have two Z3's, both made in the same year, with the same engine and so close together in the production line that the VIN numbers are almost identical - one ends in 5 and the other ends in 8.

Despite being made at the same time, my main zed, that I use daily, had a fair bit of corrosion underneath - brake lines, handbrake cables and shoes have all been renewed for that reason. I believe that the corrosion is present mainly because the car has spent most of its life near the coast and/or with the car being low mileage it hasn't been stored correctly.
So I tried to remove the spare tire and carrier to begin the 'restoration'. The spare tire came off easily, however, the carrier was a whole different story. I was unable to remove the handle, no matter how much WD-40 I used, I tried using vice grips but the thing had seized completely - after a bruised hand I had achieved absolutely nothing and the bit that screws in snapped. Then it was time to remove the carrier from the body which involves removing a long 10mm bolt - the extent of corrosion meant that thing wouldn't budge and eventually I stripped the head. I went at it with an angle grinder which was a bit annoying as I didn't have the correct cutting disc - so the process took twice as long! Eventually, after a lot of cursing I managed to remove the bolt and the carrier.

I then tried the same process on my 'project' Z3 and was able to remove both the handle and the carrier itself without any issues!
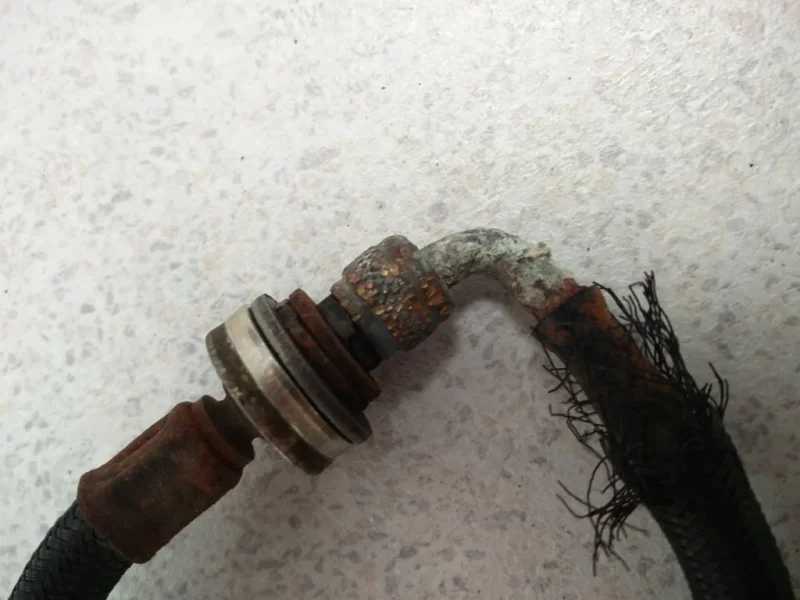
One issue I found was that the extension valve, which shows on the side of the wheel housing had seized, so I wasn't able to remove this - the wheel housing from the project allowed me to remove the extension valve - so I chose to restore that housing instead.

Here is what I had to work with:


I started by giving the entire carrier a good scrub with some soapy water. I then followed by sanding the carrier down using a dremel with an 80 grit flap disc (I didn't have anything lower than this, else it would have been used). After about an hour of sanding the carrier looked a lot better - in some spots the corrosion was so extensive that I had to sand back right to bare metal. I then wiped the entire surface down a few times with rubbing alcohol.

What I should have done at this point is apply some inhibitor - but this completely slipped my mind and I proceeded to apply a couple of light coats of primer followed by one heavy coat. I finished the night by applying a very light base coat of Satin Black.
Today I was up early and finished by applying two thicker coats of Satin Black .
Once this was done I put the carrier aside and let it dry - old vs new.


Next I started work on the wheel housing, whilst this wasn't covered in 'rust' there were rusty deposits and other scratch marks from the wheel as well as overspray marks from a previous respray - I wasn't happy about this, I gave it a thorough clean and then went at it with a scotch pad, finished this with a couple of coats of Satin Black.


The bolt holding the carrier also needed attention as it had some rust on it - sanded down and painted the bolt. I understand that the proper way would be to plate it using something like black oxide, however, for my purposes, painting it will do just fine!

The rubber pads which act as a buffer between the carrier and body were also given a quick clean


This is by no means a how to guide as I'm not a painter by trade, this is just a home DIY that I enjoyed doing, there is a good chance that corrosion may appear again 3 years down the line at which point I'll do the process again! Aren't old cars fun?")
I've sourced a spare wheel for a tenner the same size as the current wheel is too rusty and tyres too perished to safely use, the spare that I've found doesn't have any corrosion on it whatsoever, so that will be going in my zed!
Does anyone know where I can find a new valve extension - this one is 300mm in length - don't know if BMW stock them?

I'm also after the rubber pads that keep the carrier from banging against the bodywork - not the ones that I show above - the ones I need are a sponge type.
For those that don't know I have two Z3's, both made in the same year, with the same engine and so close together in the production line that the VIN numbers are almost identical - one ends in 5 and the other ends in 8.
Despite being made at the same time, my main zed, that I use daily, had a fair bit of corrosion underneath - brake lines, handbrake cables and shoes have all been renewed for that reason. I believe that the corrosion is present mainly because the car has spent most of its life near the coast and/or with the car being low mileage it hasn't been stored correctly.
So I tried to remove the spare tire and carrier to begin the 'restoration'. The spare tire came off easily, however, the carrier was a whole different story. I was unable to remove the handle, no matter how much WD-40 I used, I tried using vice grips but the thing had seized completely - after a bruised hand I had achieved absolutely nothing and the bit that screws in snapped. Then it was time to remove the carrier from the body which involves removing a long 10mm bolt - the extent of corrosion meant that thing wouldn't budge and eventually I stripped the head. I went at it with an angle grinder which was a bit annoying as I didn't have the correct cutting disc - so the process took twice as long! Eventually, after a lot of cursing I managed to remove the bolt and the carrier.
I then tried the same process on my 'project' Z3 and was able to remove both the handle and the carrier itself without any issues!
One issue I found was that the extension valve, which shows on the side of the wheel housing had seized, so I wasn't able to remove this - the wheel housing from the project allowed me to remove the extension valve - so I chose to restore that housing instead.
Here is what I had to work with:
I started by giving the entire carrier a good scrub with some soapy water. I then followed by sanding the carrier down using a dremel with an 80 grit flap disc (I didn't have anything lower than this, else it would have been used). After about an hour of sanding the carrier looked a lot better - in some spots the corrosion was so extensive that I had to sand back right to bare metal. I then wiped the entire surface down a few times with rubbing alcohol.
What I should have done at this point is apply some inhibitor - but this completely slipped my mind and I proceeded to apply a couple of light coats of primer followed by one heavy coat. I finished the night by applying a very light base coat of Satin Black.
Today I was up early and finished by applying two thicker coats of Satin Black .
Once this was done I put the carrier aside and let it dry - old vs new.
Next I started work on the wheel housing, whilst this wasn't covered in 'rust' there were rusty deposits and other scratch marks from the wheel as well as overspray marks from a previous respray - I wasn't happy about this, I gave it a thorough clean and then went at it with a scotch pad, finished this with a couple of coats of Satin Black.
The bolt holding the carrier also needed attention as it had some rust on it - sanded down and painted the bolt. I understand that the proper way would be to plate it using something like black oxide, however, for my purposes, painting it will do just fine!
The rubber pads which act as a buffer between the carrier and body were also given a quick clean
This is by no means a how to guide as I'm not a painter by trade, this is just a home DIY that I enjoyed doing, there is a good chance that corrosion may appear again 3 years down the line at which point I'll do the process again! Aren't old cars fun?
I've sourced a spare wheel for a tenner the same size as the current wheel is too rusty and tyres too perished to safely use, the spare that I've found doesn't have any corrosion on it whatsoever, so that will be going in my zed!
Does anyone know where I can find a new valve extension - this one is 300mm in length - don't know if BMW stock them?
I'm also after the rubber pads that keep the carrier from banging against the bodywork - not the ones that I show above - the ones I need are a sponge type.